Integrating your car’s remote system with your garage door opener offers unparalleled convenience. Imagine arriving home and effortlessly opening your garage door with a simple press of a button on your dashboard, eliminating the need to fumble for a separate remote. Many modern vehicles are equipped with this technology, designed to make your life easier. However, the process of programming your car to your garage door opener isn’t always straightforward. This comprehensive guide will walk you through the steps, ensuring a smooth setup and enhancing your daily convenience.
Understanding Your Garage Door Opener
Before diving into programming, it’s crucial to understand the basics of your garage door opener system. At its heart, a garage door opener is a motorized unit responsible for the smooth operation of your garage door. While specific features and button placements can vary across models and brands, the fundamental principle remains consistent.
For instance, Overhead Door™ Odyssey and Destiny models feature a user-friendly Programming Button Layout located on the back panel of the unit. This layout typically includes a ‘Program/Set’ button, alongside ‘Open Travel’ and ‘Close Travel’ buttons, often accompanied by LED indicator lights. These buttons are not only used for standard remote programming but are also essential for syncing your car’s built-in remote system.
Programming Your Car’s Remote: Step-by-Step
The process of programming your car to communicate with your garage door opener is conceptually similar to programming a traditional remote. Essentially, you are teaching your garage door opener to recognize the signal from your car’s integrated remote. Here’s a step-by-step guide to simplify this process:
-
Locate the ‘Program’ or ‘Learn’ Button on Your Garage Door Opener: This button is usually situated on the back or side of the motor unit in your garage. Refer to your garage door opener’s manual if you are unsure of its exact location.
-
Activate Programming Mode: Press and release the ‘Program/Set’ or ‘Learn’ button on your garage door opener. Immediately after pressing, an LED indicator light should illuminate or begin flashing. This indicates that your opener is now in ‘learn’ or programming mode and is ready to pair with a new remote device. Be aware that some older models may require you to press and hold the button, but for most modern openers, a quick press and release is sufficient.
-
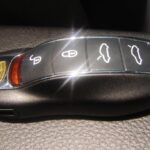
Sync Your Car’s Remote: Within 30 seconds of activating the programming mode on your garage door opener (the timeframe can vary by model, so act promptly), press and hold the desired button in your car that you wish to use for the garage door opener. You might need to press and hold the button for a couple of seconds, and in some cases, you may need to press and release the button multiple times (typically 2-3 times) as indicated by your vehicle’s manual.
-
Confirmation of Programming: Watch for a confirmation signal. The garage door opener lights might flash, or you might hear a click sound from the opener unit. These signals indicate that your car’s remote has successfully been programmed. Some vehicles also provide visual or auditory feedback within the car to confirm successful programming.
-
Test the Connection: After the confirmation, test the newly programmed button in your car. Press the button to ensure that it successfully opens and closes your garage door. If the door operates as expected, the programming is complete. If not, repeat the steps, ensuring each step is followed precisely.
Alt text: Close-up of a garage door opener unit showing the program button and LED lights, illustrating the location for initiating car programming.
Tips for Successful Programming
- Read the Manuals: Always consult both your garage door opener manual and your vehicle’s owner’s manual. These manuals provide specific instructions and troubleshooting tips tailored to your models.
- Act Quickly: Garage door openers typically remain in programming mode for only a short period (usually 30 seconds). Ensure you are ready to press the car remote button immediately after pressing the ‘Learn’ button on the opener.
- Distance Matters: Be within close range of your garage door opener when programming from your car, ideally inside the garage.
- Check Battery: Ensure that the batteries in your garage door opener remote (if applicable) are functioning and that your car’s battery is in good condition.
- Rolling Codes: Most modern garage door openers use rolling code technology for enhanced security. This system changes the security code each time the remote is used, preventing unauthorized access. The programming process outlined above is designed to accommodate rolling code systems.
- Two-Person Job (Potentially): Having someone assist you can be beneficial, especially for quickly moving between the garage door opener unit and your car.
Troubleshooting Common Issues
If you encounter difficulties programming your car to your garage door, consider these common issues and solutions:
- Opener Not Entering Program Mode: Ensure you are pressing the correct ‘Program’ or ‘Learn’ button and holding it for the appropriate duration (usually a quick press and release). Check if the LED indicator light activates as expected.
- Car Remote Not Syncing: Make sure you are pressing the car’s remote button within the time limit after activating the opener’s program mode. Try pressing and holding the car button for a longer duration or pressing it multiple times as per your car’s manual.
- Incorrect Button Press: Double-check that you are pressing the correct button on your car’s remote and that it is intended for garage door operation. Some cars have multiple programmable buttons for different functions.
- Frequency Compatibility: In rare cases, compatibility issues might arise if your car’s remote frequency does not match your garage door opener’s frequency. This is uncommon with modern systems but can occur with older or aftermarket systems. Consult the manuals to verify frequency compatibility if problems persist.
- Reset and Retry: If programming fails initially, you may need to reset your garage door opener’s memory and repeat the programming process from the beginning. Refer to your garage door opener manual for instructions on how to reset the memory.
Conclusion
Programming your car to your garage door opener is a convenient upgrade that simplifies your daily routine. By understanding the process and following these steps, you can typically establish a seamless connection between your vehicle and garage door. Remember to consult your manuals for model-specific instructions and troubleshooting tips. With a little patience and attention to detail, you’ll be enjoying the ease of in-car garage door operation in no time. If you continue to experience difficulties, professional assistance from a garage door service expert can provide tailored guidance and ensure successful integration.