Operating your gate shouldn’t require fumbling for a separate remote every time you arrive home. The convenience of controlling your gate directly from your car is a modern luxury many homeowners desire. But is it actually possible to program a new gate opener to work with your car’s built-in system? The answer is yes, and this guide from carcodereader.store, your trusted auto repair experts, will show you how.
This comprehensive article will delve into the process of programming your gate remote and seamlessly integrating it with your vehicle. We’ll cover everything from understanding the basics of gate remote programming to step-by-step instructions for various types of remotes and car systems. Enhance your home’s security and convenience by mastering the art of programming your gate opener from the comfort of your car.
Understanding Gate Remote Programming: The Essentials
Before we get into the specifics of car integration, let’s cover the fundamentals of gate remote programming. Essentially, programming a gate remote involves establishing communication between your handheld remote and the receiver unit attached to your gate. This connection allows you to send signals that instruct the gate to open or close remotely.
The key components in this process are:
- Receiver Unit: Located near your gate motor, this device receives signals from your remote and translates them into actions, controlling the gate’s movement.
- Remote Control: A handheld transmitter that sends signals to the receiver unit, allowing you to operate the gate from a distance.
Proper programming is crucial for ensuring your gate remote functions reliably, providing secure and convenient access to your property. It’s about customizing the remote’s settings to match your specific gate system and security needs.
Why Program Your Gate Opener to Your Car?
Integrating your gate opener with your car offers significant advantages, primarily convenience and enhanced security. Imagine arriving home and, with a simple press of a button on your car’s visor or dashboard, your gate opens effortlessly. No more searching for a separate remote or rolling down your window in bad weather.
Beyond convenience, integrating your gate opener into your car streamlines your access control. It reduces clutter by eliminating the need for multiple remotes and ensures you always have gate access whenever you have your car. This is particularly beneficial for households with multiple drivers.
Tools You’ll Need for Gate Remote Programming
Before you begin programming, gather these essential tools:
- Screwdriver: May be needed to access the receiver unit or battery compartment of your remote.
- Ladder (potentially): If your receiver unit is installed at height, a ladder may be necessary for safe access.
- New Batteries (if applicable): For older remotes, fresh batteries can ensure a strong signal during programming.
- Gate Remote User Manual: This is the most crucial tool, providing specific instructions for your gate remote model.
Consult your gate remote’s user manual for any model-specific tools or instructions. Some advanced systems might require programming adapters or specialized devices. Having everything prepared will make the programming process smoother and more efficient.
Step-by-Step Guide: Programming Your Gate Remote
Let’s walk through the programming process. While specific steps can vary between gate opener models, the general principles remain consistent.
Step 1: Identify Your Gate Remote Model
The first crucial step is identifying your exact gate remote model. Programming methods differ significantly between models, so accurate identification is essential. Check your user manual, the remote itself for model numbers, or the manufacturer’s website.
If you’re unsure, you can also email a picture of your remote to a specialist at carcodereader.store for assistance in identifying a compatible replacement or programming guide.
Step 2: Programming Fixed-Code Gate Remotes with Dip Switches
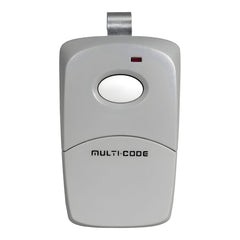
Fixed-code remotes, often featuring dip switches, are an older but still common type. Brands like Multicode and Linear frequently use this technology. Here’s how to program them:
- Locate the Receiver Unit: Find the receiver box near your gate motor. It often has an antenna.
- Access Dip Switches on Receiver: Open the receiver unit to find the dip switches.
- Access Dip Switches on Remote: Locate the dip switches on your remote, often in the battery compartment.
- Match Dip Switch Positions: Set the dip switches on your remote to match the exact pattern of the dip switches on the receiver.
- Change the Code (Optional): To set a new code, alter the dip switch positions on both the receiver and the remote to your desired new pattern.
- Programming Complete: No further steps are usually needed for dip switch remotes.
Step 3: Programming Rolling Code Gate Remotes
Rolling code remotes are more secure and widely used in modern systems from brands like LiftMaster. They use a constantly changing code to prevent unauthorized access. Programming these remotes involves a “learn” button:
- Locate the Receiver Unit: As with dip switch remotes, find the receiver near your gate motor.
- Find the “Program” or “Learn” Button: Look for a button labeled “Program” or “Learn” on the receiver unit.
- Prepare Your Remote: Have your new remote ready.
- Press the “Program” Button: Press and release the “Program” button on the receiver. An LED indicator light usually turns on.
- Press the Remote Button: Immediately press and hold the desired button on your new remote.
- Programming Complete: The LED light on the receiver will typically blink or turn off to indicate successful programming.
Integrating Your Gate Remote with Your Car System
Now, for the main question: can you program a new gate opener from your car? Yes, in many cases, you can program your car’s built-in system to learn your gate opener remote’s signal. Most modern cars with features like HomeLink® or Car2U® are designed for this.
To program your car, consult your vehicle’s owner’s manual for specific instructions on programming integrated remotes. The general process usually involves:
- Enter Programming Mode in Car: This often involves pressing and holding one or two buttons in your car (typically on the visor or rearview mirror console) until an indicator light begins to flash. You might need to clear existing codes first, usually by holding down two outer buttons for an extended period (around a minute).
Programming a Dip Switch Remote to Your Car
- Ensure Remote is Working: Verify your dip switch gate remote is functioning correctly.
- Position Remote and Car Button: Hold your existing gate remote close to the button in your car you wish to program.
- Press and Hold Both Buttons: Simultaneously press the button on your gate remote and the chosen button in your car. Hold both until the indicator light in your car changes, indicating successful programming.
- Test: Test the programmed car button to operate your gate.
Programming a Rolling Code Remote to Your Car (Two-Step Process)
Programming rolling code remotes to your car requires an additional synchronization step with the gate receiver:
- Ensure Remote is Working: Confirm your rolling code gate remote is working.
- Position Remote and Car Button: Hold your gate remote near the car button you want to program.
- Press and Hold Both Buttons: Press and hold both the remote and the car button until the car’s indicator light changes.
- Go to the Gate Receiver: Immediately go to your gate opener receiver unit and press the “Program” or “Learn” button (as you would when programming a new handheld remote). The LED light will illuminate.
- Return to Car and Activate: Go back to your car and press and hold the car button you just programmed until the gate responds or the car’s indicator light changes again. This synchronizes the rolling code.
- Test: Test the car button to ensure it now opens and closes your gate.
Troubleshooting Common Programming Issues
Encountering problems during programming is not uncommon. Here are some troubleshooting tips:
- Remote Not Syncing: Ensure you are within range of the receiver and that batteries are fresh. Double-check that you are following the correct programming steps for your specific model.
- LED Light Not Blinking: If indicator lights are not behaving as expected, re-read the manuals carefully. You might need to reset the receiver or remote (refer to manuals for reset procedures).
- Gate Not Responding: After programming, if the gate doesn’t respond, re-program, and test the handheld remote separately to rule out issues with the gate opener itself.
If issues persist, consult your gate opener and car manuals, or seek professional help from a gate technician or car audio specialist.
Benefits of In-Car Gate Opener Programming
The benefits of programming your gate opener to your car are clear:
- Unmatched Convenience: Operate your gate without searching for a separate remote.
- Enhanced Security: Streamlined access control and reduced risk of lost or stolen remotes.
- Clean Dashboard: Less clutter from multiple remotes.
- Increased Home Value: Integrated smart home features are attractive to buyers.
Compatibility Check: Car and Gate Remote Systems
While many cars and gate openers are compatible, always check for compatibility. Consult your car’s manual for integrated remote features (HomeLink®, Car2U®, etc.) and your gate opener’s specifications. If unsure, contacting the manufacturers’ customer support or a professional installer can clarify compatibility.
Maintaining Your Programmed Gate Remote and Car Integration
Proper maintenance ensures long-term reliability:
- Regular Remote Check-ups: Inspect your handheld remote and your car’s programmed button periodically. Check for battery corrosion in the remote and ensure the car’s button is still responsive.
- Battery Replacement: Replace remote batteries promptly when performance decreases.
- Re-programming (if needed): If you experience issues, re-programming both the handheld remote and the car integration might resolve them.
Conclusion
Programming your gate opener to your car is a worthwhile upgrade that enhances convenience and modernizes your home access system. By following this guide, you should be well-equipped to integrate your gate and car, enjoying seamless entry and exit every time you arrive home. Visit carcodereader.store for more automotive tech tips and solutions to keep your vehicles and home systems running smoothly.
For a wide selection of compatible gate remotes, visit: https://elitegates.net/collections/remote-controls