Integrating your car’s Homelink system with your Craftsman garage door opener should be a seamless convenience, allowing you to open and close your garage door with the touch of a button in your vehicle. However, many homeowners encounter frustrating challenges during the programming process. If you’re struggling to program your Craftsman garage door opener to your car’s Homelink, you’re not alone. This guide will walk you through the necessary steps and troubleshoot common issues to get your system working smoothly.
Understanding Rolling Code Technology
Modern garage door openers, including many Craftsman models, utilize rolling code technology for enhanced security. This system changes the access code every time the remote is used, preventing unauthorized access. Homelink systems are designed to learn these rolling codes, but the process requires a few specific steps and can sometimes be finicky.
Step-by-Step Guide to Program Homelink with Your Craftsman Garage Door Opener
Follow these steps carefully to program your Homelink system to your Craftsman garage door opener.
Step 1: Clear Existing Homelink Codes
Before programming a new garage door opener, it’s recommended to clear any previously programmed codes from your Homelink system. This ensures a clean slate for the new programming.
- Press and hold the two outer Homelink buttons (usually buttons 1 and 3) simultaneously.
- Continue holding both buttons until the Homelink indicator light begins to flash rapidly. This may take up to 20 seconds.
- Once the light flashes rapidly, release both buttons. Your Homelink system is now clear of previous programming.
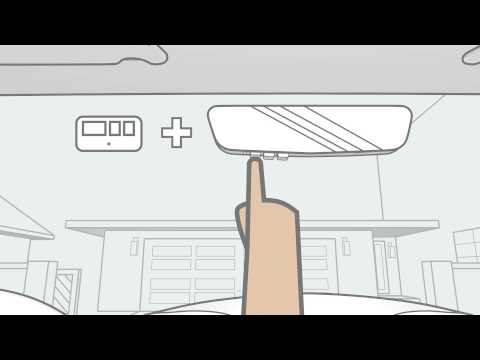
Step 2: Synchronize Homelink with Your Craftsman Transmitter
This step involves teaching your Homelink system to recognize the signal from your Craftsman garage door opener remote.
- Position your car close to the garage door, either inside or just outside the garage. Note: Some manuals suggest parking outside, likely as a precaution to prevent accidental door activation during programming.
- Take your handheld Craftsman garage door opener remote (transmitter) and position it 1-3 inches away from the Homelink button you wish to program in your car.
- Simultaneously press and hold the chosen Homelink button in your car and the transmit button on your Craftsman remote.
- Keep both buttons pressed until the Homelink indicator light in your car changes from a slow flash to a rapid flash. This indicates successful frequency signal learning. This step might take varying time depending on the Homelink version.
Step 3: Activate the “Learn” Mode on Your Craftsman Garage Door Opener
Now you need to activate the “learn” or “smart” button on your Craftsman garage door opener unit in the garage. This button puts the opener receiver into a learning mode to accept the Homelink signal.
- Locate the “Learn” button on your Craftsman garage door opener motor unit. This button is usually located on the back or side of the motor housing and is often colored (commonly yellow, red, orange, or purple).
- Press and release the “Learn” button. A small LED light near the button will usually turn on or blink, indicating that the opener is in learn mode. Note: You typically have a limited time (usually 30 seconds) after pressing the “Learn” button to complete the next step.
Step 4: Finalize Homelink Activation
Within 30 seconds of pressing the “Learn” button on the garage door opener, return to your car and complete the programming sequence.
- Press and release the programmed Homelink button in your car for two seconds.
- Repeat the press and release of the Homelink button a second time.
- For rolling code systems, it might be necessary to press and release the Homelink button a third time to complete the synchronization.
- After pressing the Homelink button the final time, your garage door should activate. If it does, the programming is successful.
Troubleshooting Common Homelink Programming Issues
Even when following the steps correctly, programming Homelink to a Craftsman garage door opener can sometimes fail. Here are some common issues and how to troubleshoot them:
Garage Door Opener Light Flashes but Door Doesn’t Open
If you observe the garage door opener light flashing when you press the Homelink button during the “Learn” process, it indicates that the Homelink system is communicating with the opener. However, if the door doesn’t open, it usually means the rolling code synchronization wasn’t fully completed.
- Try pressing the Homelink button multiple times: After pressing the “Learn” button on the opener, try pressing and holding the Homelink button in your car for 2-3 seconds, releasing, and repeating this process up to three or four times. Some systems require multiple presses to fully learn the rolling code.
- Check the “Learn” button timing: Ensure you are pressing the Homelink button within 30 seconds of pressing the “Learn” button on the garage door opener. If you exceed this time, the opener may exit the learning mode. You might need to repeat steps 3 and 4.
- Battery Backup Interference?: While less likely, in rare cases, a battery backup system might interfere with the initial programming process. If you suspect this, and if possible, try temporarily disconnecting the battery backup during the programming attempts (consult your opener manual for safe disconnection). However, for most modern systems, the “Learn” button should override any battery backup interference during programming.
Homelink Not Responding At All
If the Homelink indicator light in your car doesn’t flash or react when you press the buttons, or if the garage door opener light doesn’t flash at all, there might be a different set of issues:
- Check Homelink System Power: Ensure your car’s ignition is in the “On” or “Accessory” position for Homelink to be active.
- Homelink Battery (if applicable): Some older Homelink systems in rearview mirrors might have batteries. Check if your system requires battery replacement. Most modern integrated car Homelink systems use the car’s power.
- Compatibility: While Homelink is designed to be universally compatible with most garage door openers, in very rare cases, there might be compatibility issues. Check the Homelink website or your car’s manual for compatibility information, though Craftsman openers are generally compatible.
Bridge or Compatibility Adapter
In the vast majority of cases with Craftsman and Homelink systems, a bridge or compatibility adapter is not required. The fact that your garage door opener light flashes when you press the Homelink button strongly suggests that the systems are communicating and compatible. Bridges are typically needed for very old or non-standard garage door opener systems, which is unlikely with a 15-year-old (or newer) Craftsman opener.
Persistent Programming Failure
If you’ve tried all the troubleshooting steps and still cannot program your Homelink system, consider these final options:
- Consult Both Manuals: Re-read both your car’s Homelink manual and your Craftsman garage door opener manual carefully. Sometimes specific models have slight variations in the programming procedure.
- Homelink Customer Support: Contact Homelink customer support or visit their website. They have extensive troubleshooting resources and compatibility information.
- Professional Installation: If you are still unable to program the system, consider contacting a professional garage door installer or a car audio/accessory installation service. They have experience with these systems and can diagnose and resolve complex issues.
Programming your car’s Homelink to your Craftsman garage door opener should ultimately simplify your daily routine. By patiently following these steps and troubleshooting tips, you should be able to achieve a successful and convenient integration.
 Craftsman Garage Door Opener Learn Button Location