A start capacitor is a crucial component in many single-speed heat pumps and air conditioning units. Its primary function is to provide an initial boost of power to the compressor motor during startup. This article will guide you through the process of checking a start capacitor to ensure it’s functioning correctly.
Why Checking Start Capacitors is Important
Compressors often face resistance when starting, especially in systems with non-bleed TXVs where refrigerant pressures aren’t equalized. Without a properly functioning start capacitor, the compressor may struggle to start, draw excessive current, and eventually overheat, leading to costly repairs. Regularly Checking Start Capacitors is a preventative maintenance measure that can extend the life of your HVAC system.
How a Start Capacitor Works
The start capacitor works in conjunction with a potential relay (often a 5-2-1 relay) or a thermistor. When the system starts, the capacitor delivers a surge of current to the compressor’s start winding. This extra power overcomes the initial resistance and allows the compressor to begin rotating. Once the motor reaches approximately 75% of its operating speed, the potential relay or thermistor disengages the start capacitor from the circuit, preventing it from overheating.
Step-by-Step Guide to Checking a Start Capacitor
Before you begin, ensure you have a digital multimeter with a capacitance (MFD) setting.
-
Safety First: Disconnect the power to the HVAC system and verify it’s off using your multimeter.
-
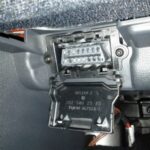
Access the Capacitor: Locate the start capacitor, typically a cylindrical black component in the electrical compartment. Photograph the wiring connections before disconnecting anything.
-
Disconnect and Discharge: Carefully disconnect the wires from the capacitor terminals. If a bleed resistor is present, remove it temporarily. Important: Always discharge the capacitor before handling it to prevent electrical shock. You can use an insulated screwdriver to short the terminals or a specialized capacitor discharge tool.
-
Measure Capacitance: Set your multimeter to the MFD setting and connect the test leads to the capacitor terminals. The reading should fall within the range printed on the side of the capacitor (e.g., 145-175 MFD).
-
Interpret Results: If the measured capacitance is outside the specified range, the capacitor is faulty and needs replacement. If the reading is within range, the capacitor is likely good. Reinstall the bleed resistor if you removed it.
-
Reconnect: Reconnect the wires to the capacitor terminals, ensuring they are attached securely in their original positions.
Visual Inspection of Start Capacitors
While multimeter testing provides a definitive answer, visual inspection can also indicate a faulty capacitor:
- Physical Damage: Look for bulges, cracks, leaks, or a blown-out top.
- Burn Marks: Examine the capacitor and surrounding components for signs of burning or discoloration.
- Oil Leaks: Oil leakage indicates a damaged capacitor seal.
Potential Relay Issues
A faulty potential relay can also cause start capacitor failure. If the relay contacts fail to open, the capacitor remains in the circuit, leading to overheating. Always inspect the potential relay when replacing a bad start capacitor. Look for burned contacts or a stuck armature.
Conclusion
Checking a start capacitor is a straightforward process that can prevent significant HVAC problems. By following these steps and understanding the role of the start capacitor, you can ensure your system runs efficiently and reliably. If you encounter a faulty capacitor or potential relay, replace both components to ensure proper system operation.