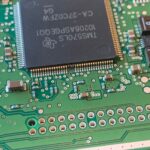
The Radio Frequency Hub (RFH), often referred to as the keyless entry module, plays a crucial role in your Dodge Charger’s keyless entry and remote start system. This article provides detailed information about the RFH, including its location, programming procedures, and replacement guidelines. Understanding these aspects can be vital for troubleshooting issues with your key fobs or the keyless entry system itself.
Where is the RF Hub Located in a Dodge Charger?
The RF Hub in a Dodge Charger is located beneath the center console, between the front seats. It’s positioned under the trim panel, closer to the dashboard side. Accessing the RFH requires removing the center console trim, which may vary slightly depending on the year and model of your Charger. The Low Frequency (LF) antenna is also located below the center console, making this area sensitive to interference.
Programming Dodge Charger Key Fobs
The RFH can be programmed to recognize up to eight key fobs. When adding or replacing a key fob, the physical key must be cut to match your Charger’s door locks. Afterward, the RFH needs to be programmed to recognize the new fob. This process requires a Sentry Key PIN, obtainable through DealerCONNECT.
Programming Steps:
- Ensure Fewer Than Eight Fobs: Use a diagnostic scan tool to verify that fewer than eight key fobs are currently programmed to the RFH.
- Ignition Off: Turn the ignition off. It must remain off throughout the programming process.
- Access Programming Function: Using the scan tool, navigate to “Misc. Functions” and select “Program Ignition FOBIKs.”
- FOBIK Position (Push-Button Start): Hold the new FOBIK near or on the center console.
- FOBIK Position (Rotary – FOBIK Insertion): Insert the new FOBIK into the ignition in the LOCK position.
- Enter Sentry Key PIN: Enter the Sentry Key PIN into the scan tool when prompted.
- Follow On-Screen Instructions: Follow the on-screen prompts carefully. Do not press any buttons on the FOBIK during programming unless instructed.
- Verify Programming: Once programming is complete, verify operation by testing all FOBIK buttons and ensuring the vehicle starts. Use the scan tool to confirm the correct number of programmed FOBIKs.
Important Considerations:
- One FOBIK at a Time: Only one FOBIK can be programmed at a time.
- Interference: Keep other FOBIKs and electronic devices (laptops, cell phones) away from the center console area during programming to avoid interference with the LF antenna.
- FOBIK Battery: Test the FOBIK battery before programming using an RFI tool to ensure it’s functioning correctly.
Replacing the RF Hub
Replacing the RFH usually necessitates replacing the steering column lock module (ELV/ESCL) as well. This process requires careful adherence to a specific sequence outlined in the service information. Both modules must be new and initialized using a diagnostic scan tool in the correct order to avoid rendering them unusable. Consult the service manual for detailed instructions.
Post-Replacement Procedures:
- FOBIK Programming: After replacing the RFH and ELV/ESCL, all key fobs must be reprogrammed.
- Module Initialization: Perform the “RF Hub Replace” and “ELV Replaced” routines using the scan tool.
- Verification: Verify system functionality by checking ignition operation and steering column lock/unlock functionality.
RF Hub Verification Test
After any repair involving the RFH, perform a verification test:
- Reconnect Components: Reconnect any previously disconnected components.
- Program Key Fobs: Program all key fobs to be used with the vehicle.
- Run RF Hub Replace Routine (if applicable): If the RFH was replaced, perform the “RF-HUB Replace” routine using the scan tool.
- Erase and Read DTCs: Erase all RFH Diagnostic Trouble Codes (DTCs), operate all RFH functions, wait four minutes, and then read DTCs again. Any remaining DTCs indicate an unresolved issue.
This image depicts a scan tool displaying key fob programming information. Consult your specific scan tool’s instructions for accurate procedures.
