Integrating your car’s built-in remote system with your Genie garage door opener enhances convenience and security. Modern vehicles often come equipped with HomeLink or Car2U systems, seamlessly embedded technologies designed to control your garage door without the need for a separate, handheld remote. These systems, typically found as three buttons located on your car’s visor or overhead console, operate directly from your vehicle’s power, eliminating battery concerns and streamlining your access. Genie garage door openers are fully compatible with both HomeLink and Car2U, making the “Genie Pro Max Program Car” process straightforward.
Programming Your HomeLink System for Genie Garage Door Openers
For vehicles equipped with HomeLink, programming to your Genie opener is a simple process. HomeLink systems are identifiable by a single LED indicator and often feature a house icon on the central button.
Step 1: Clearing Existing HomeLink Programming
Begin by clearing any previously programmed settings. Press and hold the first and third HomeLink buttons simultaneously. Keep holding until the indicator light blinks slowly, then rapidly for about 20 seconds. Release both buttons. This reset ensures a clean slate for programming your Genie opener, and it’s important to note that this will erase all previously programmed devices.
Step 2: Training HomeLink with Your Genie Remote
Next, you’ll need your Genie garage door opener remote. Choose the HomeLink button you wish to assign to your garage door. Position your Genie remote approximately two inches away from the selected HomeLink button. Press and hold the button on your Genie remote. While keeping the Genie remote button pressed, also press and hold the chosen HomeLink button. Continue holding both until the HomeLink indicator light changes from a slow to a rapid blink. Once it blinks rapidly, release both buttons.
Step 3: Finalizing Programming with Your Genie Opener
The final step involves syncing HomeLink with your Genie garage door opener unit itself. The procedure varies slightly depending on whether you have a newer or older Genie model.
For Newer Genie Garage Door Openers (with a Program Button):
- Locate the PROGRAM button on your Genie garage door opener motor unit. Press and hold it until a round blue LED illuminates, then release. A long purple LED will then start to flash, indicating it’s in programming mode.
- Press and hold the HomeLink button you programmed in Step 2 for two seconds, then release. Repeat this press-and-release sequence one more time. The long LED on the Genie opener will flash blue and then turn off.
- Test the programming by pressing the HomeLink button a few times. Your garage door should now activate.
For Older Genie Garage Door Openers (with a Learn Button):
- Find the learn code button on your Genie garage door opener powerhead. Press and release this button; a red LED will begin to blink, signaling it’s ready to learn.
- Press the desired HomeLink button once. The red LED on the opener will stop blinking and remain continuously lit.
- Press the same HomeLink button a second time. The red LED will turn off.
- Press the HomeLink button again to test. Your garage door should now respond.
For further assistance, consult your vehicle’s owner’s manual, visit www.homelink.com, or the Genie Company website at www.GenieCompany.com.
Programming Your Car2U System for Genie Garage Door Openers
Car2U systems, featuring three LED lights above each button, also offer seamless integration with Genie garage door openers.
Step 1: Resetting Car2U to Factory Defaults
Car2U systems come with pre-set defaults: Button 1 for Genie®, Button 2 for LiftMaster®, and Button 3 for Wayne Dalton® openers.
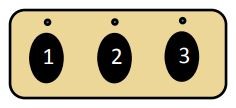 Car2U car buttons for garage door operation
To reset and clear any programming, press and hold buttons 1 and 3 simultaneously for approximately 20 seconds, or until all three LEDs start flashing. Release both buttons. This returns the Car2U system to its factory default settings, erasing any previously programmed garage door openers.
Step 2: Programming Car2U to Recognize Your Genie Opener
Programming Car2U to your Genie opener mirrors the HomeLink process, with slight variations for newer and older Genie models.
For Newer Genie Models (with a Program Button):
- Press and hold the PROGRAM button on your Genie garage door opener’s powerhead until the round blue LED turns on, then release. The long purple LED will start to flash.
- Press and hold your chosen Car2U button for two seconds and release. Repeat this press and hold for another two seconds and release. The long LED will flash blue and then turn off, indicating successful signal reception.
- Test the connection by pressing the Car2U button a few times until your garage door operates.
For Older Genie Models (with a Learn Button):
- Locate the learn code button on your Genie garage door opener’s powerhead. Press and release it; the red LED will begin to blink.
- Press your selected Car2U button once. The red LED will stop blinking and stay lit.
- Press the same Car2U button again. The red LED will turn off.
- Press the Car2U button again to operate your garage door.
Step 3: Reassigning a Factory Default Button for a Genie Opener
If you wish to use a button initially designated for another brand for your Genie opener, follow these steps:
- Press and hold Car2U buttons 1 and 3 for just ONE SECOND, then release. All three LEDs will light up solid red.
- Press and hold the button you wish to reassign to Genie (button 2 or 3). The corresponding LED will flash. While still holding this button, press and release button 1, and then press and release button 1 again.
- Release the button you’ve been holding in step 2. Wait for the LED to stop flashing. This button is now configured for your Genie opener. Repeat for another Genie opener if needed.
For additional support, refer to your vehicle’s manual, visit learcar2u.com, or Genie’s website at www.GenieCompany.com.
By following these steps, you can easily achieve “genie pro max program car” integration, making your daily comings and goings more convenient and secure.