Imagine the convenience of arriving home and, with just a press of a button in your car, your gate smoothly opens. No more fumbling for a separate remote or rolling down your window in bad weather. Programming your gate opener to your car is a fantastic upgrade for both convenience and security. As car and home automation experts at carcodereader.store, we’re here to guide you through every step of this process. This comprehensive guide will explain not only how to program your gate opener to your car, but also the why and what behind it, ensuring you have all the information you need for a successful setup.
Understanding the Basics of Gate Opener Programming
Before we jump into the specifics, it’s crucial to understand the fundamentals of how gate opener programming works. At its core, programming a gate opener involves establishing communication between your gate’s receiver and a transmitter, which in this case, is your car’s built-in system or a compatible remote.
The receiver unit is the brain of your gate system. Typically housed in a box near your gate motor, it’s designed to receive radio signals from your remote. When it receives the correct signal, it triggers the gate motor to open or close.
The transmitter, whether it’s a handheld remote or your car’s HomeLink system, sends out a unique radio frequency signal. Programming essentially teaches the receiver to recognize and respond to this specific signal. This ensures that only authorized devices can operate your gate, significantly enhancing your property’s security.
Why Program Your Gate Opener to Your Car?
Programming your gate opener to your car offers several compelling advantages:
- Unparalleled Convenience: No more searching for a separate remote! Operating your gate becomes as simple as pressing a button already integrated into your vehicle’s dashboard or visor.
- Enhanced Security: By integrating the gate opener with your car, you reduce the risk of losing or misplacing a separate remote. It’s always with you, secured within your vehicle.
- Streamlined Access: Especially useful for multi-car households, programming your gate opener to each vehicle ensures seamless access for all authorized drivers.
- Modern Home Integration: Integrating your gate with your car is a step towards a smarter, more connected home, aligning with the increasing demand for seamless automation in daily life.
Essential Tools and Preparations
Before you begin, gather these essential tools and information:
- Your Car’s Owner Manual: This is crucial for understanding your car’s built-in system (like HomeLink) and how to program external devices.
- Your Gate Opener’s Manual: This manual contains vital information about your gate opener model, the type of remote it uses (dip switch or rolling code), and specific programming instructions.
- Your Existing Gate Remote (if applicable): For some programming methods, you’ll need your working gate remote to transmit the signal to your car.
- Screwdriver (possibly): You might need a screwdriver to access the receiver unit or battery compartment of your gate remote.
- Ladder (potentially): If your receiver unit is mounted high, a ladder may be necessary for safe access.
- Fresh Batteries (if needed): Ensure your gate remote has fresh batteries for optimal signal transmission during programming.
Having everything prepared beforehand will make the programming process smoother and more efficient.
Step-by-Step Guide to Program Your Gate Opener to Your Car
The programming process varies depending on the type of gate remote you have (fixed-code or rolling code) and whether you are using a standalone remote or your car’s built-in system. Let’s break down the most common methods:
1. Identifying Your Gate Remote Type: Dip Switch vs. Rolling Code
The first crucial step is to determine whether your gate remote uses dip switches (fixed code) or rolling code technology. This will dictate the programming method you need to follow.
-
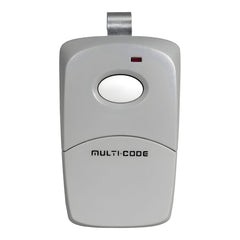
Dip Switch Remotes (Fixed Code): These older remotes use a series of tiny switches (dips) inside the remote and receiver. The code is set by the position of these switches. If your remote has a visible compartment with small switches, it’s likely a dip switch remote. These are generally easier to program to a car’s system.
-
Rolling Code Remotes: Modern gate openers primarily use rolling code technology for enhanced security. These remotes transmit a unique code that changes with each use, preventing code theft and unauthorized access. Rolling code remotes usually require a “learn” or “program” button to be pressed on the receiver unit for programming.
If you are unsure, consult your gate opener’s manual or the manufacturer’s website. Identifying the correct type is critical for successful programming.
2. Programming a Dip Switch Remote to Your Car
Programming a dip switch remote to your car is usually a straightforward process:
- Ensure Your Remote is Working: Verify that your existing dip switch remote is functioning correctly and can open and close your gate.
- Locate the Programming Button in Your Car: Refer to your car’s owner manual to find the programming buttons for your car’s built-in system (often HomeLink or similar). These are usually located on the rearview mirror, visor, or dashboard.
- Initiate Car Programming Mode: Follow your car’s manual to enter programming mode. This often involves pressing and holding one or two of the car’s programming buttons until an indicator light begins to flash or change. Some systems might require you to clear existing codes first by pressing and holding outer buttons for an extended period (e.g., 20-60 seconds).
- Transmit the Remote Signal: Hold your working dip switch remote close to the button in your car you wish to program. Simultaneously press the button on your existing remote and the chosen programming button in your car. Keep holding both buttons until the indicator light in your car changes, blinks rapidly, or stays solid. This indicates that your car has learned the remote’s signal.
- Test the Programming: Press the programmed button in your car to see if it activates your gate. If the gate opens and closes, you have successfully programmed your dip switch remote to your car.
3. Programming a Rolling Code Remote to Your Car (Two-Step Process)
Programming a rolling code remote to your car typically involves a two-step process for security reasons:
- Initial Car Programming (Remote to Car):
- Working Remote: Ensure your rolling code remote is working with your gate.
- Car Programming Mode: Enter your car’s programming mode as described in your car’s manual (similar to dip switch programming).
- Signal Transmission: Hold your rolling code remote close to your car’s programming button. Press and hold the button on your remote and the chosen button in your car simultaneously. Wait for the indicator light in your car to signal that it has received a signal (light change, rapid blinking).
- Receiver “Learn” Process (Car to Gate Receiver):
- Locate Receiver “Learn” Button: Go to your gate opener’s receiver unit (the box near your gate motor). Locate the “Learn” or “Program” button on the receiver. This button is usually small and may be behind a cover.
- Press Receiver “Learn” Button: Press and release the “Learn” button on the receiver. An LED indicator light on the receiver should turn on, indicating it is in learning mode (usually for a limited time, like 30 seconds).
- Transmit from Car to Receiver: Immediately return to your car and press and hold the programmed button in your car (the one you programmed in step 1). Hold it until the gate activates, or the receiver’s indicator light blinks or turns off, indicating successful programming. You might need to press and hold for a few seconds.
- Test: Test the programmed button in your car. Your gate should now open and close when you press it.
This two-step process is necessary for rolling code systems because it requires both the car to learn a signal from a remote and the gate receiver to acknowledge a signal initiated from the car.
4. Programming a Universal Gate Opener Remote to Your Car
If you’re using a universal gate opener remote, the process is often similar to programming a rolling code remote to your car. Universal remotes are designed to be compatible with various gate and garage door opener brands and may require a slightly different programming sequence. Always refer to the universal remote’s manual for specific instructions, as they can vary between brands and models.
Troubleshooting Common Programming Issues
Encountering problems during programming is not uncommon. Here are some troubleshooting tips:
- Check Batteries: Ensure both your gate remote and car remote (if applicable) have fresh batteries. Low batteries can significantly weaken signal strength.
- Distance: Be within close range of both your car and the gate receiver during programming.
- Reset Car System: If you’re having trouble programming your car’s built-in system, try resetting it by clearing all existing codes (refer to your car’s manual).
- Receiver Mode Timeout: The receiver’s “learn” mode usually times out after a short period (e.g., 30 seconds). If programming fails, you may need to repeat the receiver “learn” step more quickly.
- Interference: Radio interference can sometimes disrupt the programming process. Try programming in an area away from potential sources of interference, like power lines or other radio transmitters.
- Consult Manuals: Re-read both your car’s and gate opener’s manuals carefully. Often, the solution lies in precisely following the manufacturer’s instructions.
- Professional Help: If you are still unable to program your gate opener, consider contacting a professional gate installer or a car audio/electronics specialist. They have expertise in these systems and can diagnose and resolve complex issues.
Maintaining Your Programmed Gate Opener
Once your gate opener is successfully programmed to your car, proper maintenance will ensure long-term reliable operation:
- Regular Testing: Periodically test the programmed button in your car to ensure it’s still working correctly.
- Battery Replacement: Replace batteries in your gate remote and car remote (if applicable) proactively, before they completely fail.
- Check Connections: Inspect the wiring and connections of your gate receiver unit occasionally to ensure they are secure and free from corrosion.
- Keep Clean: Keep your remotes and car’s programming buttons clean and free of debris for optimal performance.
Conclusion
Programming your gate opener to your car is a worthwhile investment in convenience and security. By following this comprehensive guide, understanding your equipment, and taking a step-by-step approach, you can successfully integrate your gate access into your vehicle. Enjoy the ease of one-touch gate operation from the comfort of your car!
For a wide selection of gate remotes and accessories to enhance your gate automation system, visit carcodereader.store today!