Python remote car starters are a popular aftermarket addition to vehicles, offering convenience and comfort. If you’re looking to program or reprogram your Python remote car starter, this guide provides clear instructions to help you through the process. Whether you’re replacing a remote or setting up a new system, understanding the programming steps is essential. Follow these instructions carefully to successfully pair your remote with your Python car starter system.
Preparing Your Vehicle for Remote Learning
Before you begin programming your remote, you need to put your vehicle into remote learning mode. This process involves a few key steps that must be performed in sequence:
- Open the Driver’s Side Door: Ensure the driver’s side door is open and remains open throughout the preparation process.
- Turn the Ignition to the “ON” Position: Insert your key into the ignition and turn it to the “ON” position. This is the position right before starting the engine, where the dashboard lights illuminate.
- Press and Release the Valet/Program Button (Once): Locate the valet/program button, which is usually a small, often recessed button. Within 5 seconds of turning the ignition ON, press and release this button one time.
- Press and HOLD the Valet/Program Button (Confirmation): Immediately after releasing the button, press and hold the valet/program button again. Keep holding it down.
- Observe the LED and Siren: As you hold the valet/program button, watch for the LED indicator to flash one time and listen for the siren to chirp. These signals confirm that your vehicle has successfully entered remote pairing mode.
- Release the Valet/Programming Button: Once you observe the LED flash and siren chirp, you can release the valet/programming button. The vehicle is now ready to learn the remote signal.
Programming the Remote Control
With your vehicle in remote learning mode, you can now program your Python remote control. These steps detail how to pair your remote:
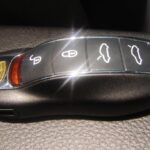
- Hold the “F” Button for 8 Seconds: On your Python remote, press and hold the “F” button for 8 seconds. You will likely hear an alert at 3 seconds – ignore this and continue holding the button. The display will show “MAIN MENU” when held long enough.
- Release the “F” Button: Once you see “MAIN MENU” displayed, release the “F” button. The LCD text will then change to display “SETUP REMOTE”.
- Navigate to “PAIR REMOTE”: Use the navigation buttons to scroll through the menu options. Pressing the “AUX” button typically steps up through the menu, while pressing the circular arrow button with a center dot steps down. Navigate until you see “PAIR REMOTE” displayed on the screen.
- Select “PAIR REMOTE”: When “PAIR REMOTE” is displayed, press and HOLD the “F” button for 1 second to select this option. The remote will emit 3 short beeps, and the LCD text will change to “PAIR”.
- Press the “LOCK” Button (Pairing Confirmation): Within 5 seconds of the remote displaying “PAIR”, press the “LOCK” button on the remote. If successful, the system siren will sound, indicating that the remote has been successfully learned.
- Exit the “MAIN MENU”: After successful pairing, press the “F” button one time to exit the “MAIN MENU”.
- Navigate to “EXIT”: Use the circular arrow button with a center dot to scroll down through the menu options until “EXIT” is displayed on the screen. You will likely need to press this button two times.
- Final Exit: Press the “F” button one last time to exit the programming menu completely.
Troubleshooting Tips
If you encounter issues during the programming process, consider these troubleshooting tips:
- Timing is Critical: The timing in these procedures is crucial. Ensure you are performing the button presses and releases within the specified timeframes. If it doesn’t work on the first try, repeat the process, paying close attention to timing.
- Confirm Siren Chirps and Display Changes: Throughout the process, pay close attention to the siren chirps and the remote display changes. These are your indicators that the system is responding correctly. If you don’t hear chirps or see the expected display, restart the process from the beginning.
- Try Another Remote: If you have another remote that came with your system, try programming it to rule out a faulty remote. Sometimes, using a different remote can help identify if the issue lies with a specific remote or the system itself.
- Valet/Program Button Location: Ensure you are using the correct valet/program button. If you are unsure of its location, consult your vehicle’s manual or the Python remote starter system documentation.
By following these steps and paying attention to detail, you should be able to successfully program your Python remote car starter. If you continue to experience difficulties, it may be helpful to consult the Python remote starter system manual or seek assistance from a professional car audio installer.