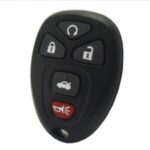
Car key fobs, or remotes, are incredibly convenient devices that control various car functions from a distance, such as locking and unlocking doors, activating the alarm, and even starting the engine in some models. However, these electronic devices can sometimes lose their programming due to signal issues or battery changes. Fortunately, in many cases, you can reprogram your car remote yourself without the need to visit a dealership or call an expensive auto locksmith. This guide provides a general step-by-step process on how to program a car remote, empowering you to restore functionality quickly.
While the following steps offer a general approach, it’s crucial to understand that specific programming procedures can vary significantly depending on your car’s make, model, and year. Therefore, before you begin, always consult your vehicle’s owner’s manual for the most accurate and manufacturer-recommended instructions for how to program your car remote. You can usually find a digital version of your manual online if you don’t have a physical copy.
Step-by-Step Guide to Program Your Car Remote (General Method)
This method is a common procedure that works for many vehicle models. Remember to act swiftly between steps, as timing can be crucial for successful programming.
STEP 1: Get Ready in the Driver’s Seat and Turn On the Ignition
First, sit in the driver’s seat of your car with all doors closed. Have both your ignition key and the car remote you wish to program ready. Insert your ignition key into the ignition switch. Turn the key to the “ON” position. This is the position just before you would crank the engine to start. Do not start the engine. The car’s electrical system should be active, but the engine should remain off.
STEP 2: Press the Lock Button on Your Car Remote
Take your car remote and aim it towards the dashboard area, specifically in the direction of the rearview mirror. This is often where the radio receiver for the remote locking system is located in many vehicles. Press and hold the “lock” button on the remote for a few seconds. You might need to press and hold it for a specific duration, which could be outlined in your owner’s manual.
STEP 3: Turn Off the Ignition and Observe for System Reset
Immediately after pressing the lock button for the required duration, turn the ignition key back to the “OFF” position. Remove the key from the ignition. The car’s system should now be attempting to recognize and program the remote signal. You might hear a chime or see a light flash, indicating that the system is resetting or entering programming mode. Act quickly in this step, minimizing the time between turning off the ignition and proceeding to the next step.
STEP 4: Repeat the Process for Additional Car Remotes
If you have multiple car remotes to program, it’s essential to program them all in sequence during the same programming session. Many car systems will erase the programming of previously working remotes when a new one is programmed. Therefore, immediately repeat steps 2 and 3 for each additional remote you want to program. Again, speed is key. Turn the ignition back to “ON” (without starting the engine), press the lock button on the next remote, and then turn the ignition “OFF.” Repeat this for all remotes.
STEP 5: Test the Car Remotes to Finalize Programming
After you have cycled through all the remotes you wish to program, finalize the process by testing each remote. Turn the ignition to the “ON” position one last time (without starting the engine). Then, press the lock button on each remote individually. If the programming was successful, you should hear the car doors lock and unlock in response to each remote’s lock button press. This audible confirmation indicates that each car remote has been successfully programmed to your vehicle.
Important Considerations and Tips for Car Remote Programming
- Consult Your Owner’s Manual: Always prioritize the specific instructions in your car’s owner’s manual. The method described above is a general guideline, and your vehicle may require a different sequence or additional steps.
- Variations Across Car Models: Car remote programming procedures can vary widely between different car manufacturers and even models within the same brand. Some cars may require the use of a valet key, pressing specific pedals, or a different combination of ignition and button presses.
- Troubleshooting: If the programming process doesn’t work on the first attempt, carefully reread your owner’s manual and ensure you are following the steps precisely, paying close attention to timing. Sometimes, repeating the entire process a couple of times can resolve minor glitches.
- When to Seek Professional Help: If you are unable to program your car remote after several attempts, or if your owner’s manual indicates a more complex procedure requiring specialized equipment, it’s best to consult a qualified auto locksmith or your car dealership. They have the expertise and tools to diagnose and resolve more complex car remote programming issues.
In conclusion, programming your car remote can often be a straightforward process you can accomplish at home. By following these general steps and, most importantly, consulting your vehicle’s owner’s manual for specific instructions, you can regain the convenience of your car remote and avoid unnecessary trips to the mechanic.