Gaining access to your community gate should be a seamless part of your day, not a hassle. Programming your community gate remote to your car offers unparalleled convenience, allowing you to control gate access directly from your vehicle. This eliminates the need to fumble for a separate remote, ensuring smoother entries and exits. This guide will provide you with a comprehensive, step-by-step approach to programming your community gate remote to your car, enhancing both your convenience and security.
Understanding the Essentials of Gate Remote Programming
Before diving into the programming process, it’s crucial to understand the basic components involved. Gate remote programming is fundamentally about establishing communication between your handheld remote and the gate’s receiver. This process configures your remote to send the correct signal that the receiver unit recognizes, triggering the gate to open or close.
The key players in this system are the receiver unit, typically located near the gate operator, and the remote transmitter itself. The receiver is the gate’s “ear,” listening for the specific frequency and code transmitted by your remote. Your remote, when activated, sends this pre-programmed signal. Successful programming means your remote’s signal is correctly recognized by the receiver.
Why is understanding gate remote programming so important? Let’s explore.
Why Programming Your Gate Remote Matters
Properly programmed gate remotes are essential for secure and convenient access to gated communities and properties. Effective programming ensures your remote is not just functional, but also contributes to the overall security system.
Firstly, programming is a security measure. By correctly setting up your remote, you’re ensuring that only authorized devices can operate the gate. This prevents unauthorized access and enhances the security of your community. Modern systems often use rolling codes, which change with each use, making it significantly harder for unauthorized duplication and enhancing security further.
Secondly, programming unlocks convenience. Integrating your gate remote with your car takes this convenience to another level. Imagine approaching your community gate and, with a simple press of a button already integrated into your car’s console, the gate opens effortlessly. This streamlined process saves time and removes the daily frustration of managing multiple remotes.
Understanding these benefits makes the programming process not just a technical task, but a step towards enhancing your daily convenience and peace of mind. Now, let’s look at what you’ll need to get started.
Essential Tools for Gate Remote Programming
Gathering the right tools before you begin will streamline the programming process and prevent unnecessary delays. While the specific tools can vary slightly depending on your gate remote and car model, here are the common essentials:
- Screwdriver Set: Often, you’ll need a screwdriver to access the receiver unit or battery compartment of your remote. Ensure you have a variety of head types (Phillips head, flathead) and sizes.
- Vehicle Owner’s Manual: This is crucial for integrating the remote with your car. The manual contains specific instructions on how to program devices to your car’s built-in system, often referred to as a universal garage door opener or HomeLink system.
- Gate Remote User Manual: This manual, if available, provides specific instructions for your particular gate remote model. It will detail the type of remote (dip switch or rolling code) and any unique programming steps.
- Fresh Batteries: If you’re using an existing remote, especially if it’s been in storage, fresh batteries can prevent programming issues.
- Ladder (Potentially): Depending on the location of your gate receiver unit, you might need a ladder to safely access it.
- Programming Adapter or Device (Potentially): Some advanced gate systems may require a specific programming adapter or device. Check your manuals to see if this is necessary.
Having these tools prepared will ensure a smoother and more efficient programming experience. Always prioritize safety and take your time to understand the instructions before proceeding.
Step-by-Step Guide to Program Your Community Gate Remote
Now, let’s get into the practical steps of programming your community gate remote. The process can vary based on the type of remote you have: fixed-code (dip switch) or rolling code. We’ll cover both.
Step 1: Identifying Your Gate Remote Type and Model
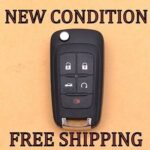
The first crucial step is to identify the type and model of your gate remote. This is vital because the programming method differs significantly between fixed-code and rolling code remotes.
How to Identify Your Remote Type:
-
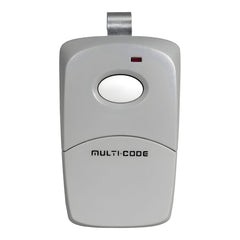
Dip Switch Remotes (Fixed-Code): These remotes typically have a series of small switches (dip switches) inside, usually accessible by opening the battery compartment or a small panel. These switches are set in an up or down position to create a unique code.
-
Rolling Code Remotes: These remotes are more modern and secure. They don’t have dip switches. Programming usually involves pressing a “Learn” or “Program” button on the receiver unit and then pressing a button on the remote. They often look more streamlined and may have a brand name and model number clearly visible.
Finding Your Model Number:
- Check the Remote Housing: Look for a sticker or label on the back or inside the battery compartment of your remote. It should list the manufacturer and model number.
- User Manual: If you have the original user manual, it will contain the model information.
- Manufacturer’s Website: If you know the manufacturer, their website might have a remote identification section or support documentation.
Once you’ve identified your remote type and ideally the model, you can proceed with the correct programming steps.
Step 2: Programming Fixed-Code (Dip Switch) Gate Remotes
Programming dip switch remotes involves matching the switch settings on your remote to those on the gate receiver.
-
Locate the Receiver Unit: Find the receiver unit for your community gate. This is typically a box near the gate operator. It may have an antenna.
-
Access Dip Switches on Receiver: Open the receiver unit to locate the dip switches. They are usually behind a small window or cover.
-
Access Dip Switches on Remote: Open your remote to find its dip switches. This is often in the battery compartment.
-
Match Switch Positions: Carefully set the dip switches on your remote to match the exact pattern (Up/Down positions) of the dip switches on the receiver.
-
Test: Close up both units, and test your remote. Stand near the gate and press the button. The gate should respond.
Step 3: Programming Rolling Code Gate Remotes
Rolling code remotes use a “learn” button method for programming, enhancing security.
-
Locate the Receiver Unit: As with dip switch remotes, find the receiver unit near the gate operator.
-
Find the “Learn” or “Program” Button: Look for a button on the receiver unit labeled “Learn,” “Program,” or something similar. There might also be an indicator LED.
-
Press the “Learn” Button: Press and release the “Learn” button on the receiver. The LED indicator usually lights up or blinks to show it’s in programming mode.
-
Activate Your Remote: Within 30 seconds of pressing the “Learn” button, press and hold the button on your gate remote that you want to program.
-
Wait and Test: The receiver LED usually blinks or turns off to indicate successful programming. Release the remote button and test it by pressing it again to see if the gate opens.
Integrating Your Gate Remote with Your Car’s System
Now for the ultimate convenience – programming your gate remote to your car. Most modern cars come equipped with a built-in system (like HomeLink or Car2U) that can learn and operate garage doors and gates. Consult your vehicle’s owner’s manual for the precise instructions, as steps can vary by manufacturer. However, here are general guidelines for both dip switch and rolling code remotes:
Programming a Dip Switch Remote to Your Car
- Prepare Your Car System: Refer to your car’s manual to enter the programming mode for your built-in system. This often involves pressing and holding one or two buttons in your car until an indicator light blinks. You may need to clear existing codes first, as per your car manual.
- Synchronize with Handheld Remote: Hold your programmed handheld gate remote close to the button in your car you wish to program.
- Simultaneous Press: Press and hold the button on your handheld remote and the chosen button in your car at the same time. Keep holding until your car indicates successful programming (usually a change in the indicator light – consult your manual).
- Test: Test the programmed button in your car to see if it opens the gate.
Programming a Rolling Code Remote to Your Car (Two-Step Process)
Rolling code systems often require a two-step “learning” process for car integration due to enhanced security.
- Initial Car Programming: Follow steps 1-3 above for dip switch remotes to initially program your car to recognize the transmission frequency of your handheld remote.
- Gate Receiver Learning Step: Go to your gate receiver unit. Press the “Learn” or “Program” button on the receiver (as you would when programming a new handheld remote directly to the gate).
- Finalize Car Programming: Return to your car and press and hold the programmed button in your car for a longer duration (as specified in your car manual, often several seconds up to 20-30 seconds). This allows the car to learn the rolling code directly from the gate receiver indirectly, via your car’s system.
- Test: Test the programmed car button to ensure it now operates the gate.
Troubleshooting Common Programming Issues
Encountering issues during programming is not uncommon. Here are some troubleshooting tips:
- Remote Not Syncing:
- Battery Check: Ensure both your handheld remote and car (if applicable) have fresh batteries.
- Proximity: Make sure you are close enough to the receiver unit during programming.
- Correct Procedure: Double-check you are following the exact programming steps for your remote type and car model.
- LED Not Blinking/Responding:
- Receiver Power: Verify the gate receiver unit is powered on.
- Button Functionality: Ensure the “Learn” button on the receiver and buttons on your remotes are functioning correctly.
- Gate Not Responding After Programming:
- Compatibility: Re-verify compatibility between your remote, gate system, and car system.
- Code Overwrite: If you’re adding a new remote, ensure you’re not accidentally overwriting a previously programmed remote if there are memory limits on the receiver.
- Range: Test the remote from a closer range to rule out range issues.
Always refer back to the user manuals for both your gate remote and vehicle for specific troubleshooting guidance. If issues persist, consider contacting a professional gate technician.
Maintaining Your Programmed Gate Remote System
Once programmed, maintaining your gate remote system ensures continued reliability.
- Regular Battery Checks: Periodically check and replace batteries in your handheld remote and car system as needed. Low batteries are a common cause of remote malfunction.
- Cleanliness: Keep your remotes clean and free from dirt and debris, especially around buttons and contact points.
- Range Testing: Occasionally test the range of your remotes to detect any degradation in signal strength early on.
- Reprogramming as Needed: If you experience intermittent issues or after battery changes, you may need to re-initiate the programming sequence to ensure optimal performance.
Conclusion
Programming your community gate remote to your car is a significant step towards enhancing your daily convenience and integrating your access control seamlessly into your vehicle. By understanding the type of remote you have, following the correct programming steps, and performing basic maintenance, you can enjoy the ease of gate access directly from your car. Embrace the simplicity and security this integration offers, making your entry and exit from your community smoother and more efficient than ever before.
For a wide selection of gate remotes and accessories, visit https://elitegates.net/collections/remote-controls.