Gaining access to your community should be seamless and secure. For residents of gated communities, programming your car to operate the community gate is a significant convenience. Instead of fumbling for a separate gate remote, you can simply use a button already in your vehicle. This guide, brought to you by the auto experts at carcodereader.store, will walk you through the process of programming your car to open your community gate, ensuring smooth and secure access every time.
Understanding Community Gate Access Systems
Before diving into programming, it’s helpful to understand the basics of how community gate access systems work. These systems typically involve a gate receiver and a remote transmitter. The receiver is installed at the gate and responds to signals from your remote transmitter, which is usually a handheld device. Programming essentially establishes a communication link between your transmitter (or your car’s built-in system) and the gate receiver.
There are two primary types of gate remote systems you might encounter in your community:
- Dip Switch Remotes (Fixed Code): These older systems use a series of physical switches (dip switches) to set a code. Programming involves matching the switch configuration on your remote to the receiver.
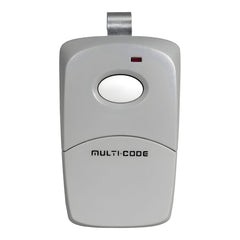
- Rolling Code Remotes: More modern and secure, rolling code systems use a constantly changing code to prevent unauthorized access. Programming these remotes usually involves a “learn” button on the receiver.
Understanding which type of system your community uses is the first step in successfully programming your car.
Why Program Your Car to Your Community Gate?
Integrating your community gate opener into your car offers several key advantages:
- Convenience: No more searching for a separate remote! Operation becomes as simple as pressing a button in your car, just like your garage door opener.
- Security: Having an integrated system reduces the risk of losing or misplacing a separate gate remote.
- Streamlined Access: Especially in inclement weather, being able to open the gate without rolling down your window to punch in a code or present a card is a significant benefit.
- Modern Integration: Utilizing your car’s built-in technology for gate access brings a modern touch to your daily routine.
Tools You Might Need
The tools required are generally minimal for programming your car to a community gate. You’ll likely need:
- Your Car’s Owner Manual: This is crucial for understanding how to access your car’s built-in remote programming functions.
- Your Existing Gate Remote (if applicable): You may need your current remote to transmit the signal to your car’s system.
- Access to the Gate Receiver: Depending on the type of system, you might need to access the gate receiver unit, which is usually located near the gate itself.
- Step Ladder (potentially): If the receiver unit is mounted high, a step ladder might be necessary for safe access.
Always prioritize safety when accessing gate equipment. If you are uncomfortable or unable to reach the receiver safely, consider contacting your community management or a professional technician.
Step-by-Step Guide to Program Your Car for Community Gate Access
The programming process varies depending on whether your community gate uses a dip switch (fixed code) system or a rolling code system, and the specific features of your car. Here’s a general guide for both types:
Programming for Dip Switch (Fixed Code) Community Gates
-
Locate the Dip Switches: First, you’ll need to find the dip switches on both your existing gate remote and the gate receiver. The receiver is usually in a box near the gate. The dip switches are small switches, often numbered, that can be in an “up” or “down” position.
-
Match the Dip Switch Settings: Open both your current remote and the receiver unit. Carefully observe the position of each dip switch on the receiver. Then, configure the dip switches in your car’s built-in remote system (refer to your car’s manual for how to access this – it often involves pressing and holding specific buttons in your car) to exactly match the pattern you observed on the gate receiver.
-
Test: After setting the dip switches in your car, test the programmed button. Drive up to the community gate and press the button you programmed. If the gate opens, you’ve successfully programmed your car!
Programming for Rolling Code Community Gates
-
Enter Car Programming Mode: Consult your car’s owner manual to learn how to initiate the programming mode for your car’s built-in remote system. This usually involves a sequence of pressing and holding specific buttons in your car until an indicator light flashes. You may need to clear existing codes first, often done by holding two outer buttons for an extended period (around a minute).
-
Locate the “Learn” Button on the Gate Receiver: Find the receiver unit for your community gate. Look for a button labeled “Learn,” “Program,” or something similar.
-
Press the “Learn” Button: Press and release the “Learn” button on the gate receiver. An LED light on the receiver should illuminate, indicating it’s in programming mode. You typically have a limited time (usually 30 seconds) to complete the next step.
-
Transmit from Your Car: Immediately return to your car and press and hold the programmed button in your car for a few seconds. You might need to repeat this process a couple of times. The gate receiver’s LED light should blink or turn off to indicate it has received and learned the signal from your car.
-
Test: Test the programmed button by approaching the community gate and pressing it. The gate should open if the programming was successful.
Integrating with Existing Gate Remotes (For Cars with Limited Programming)
In some cases, your car’s built-in system might require you to “learn” from an existing remote rather than directly from the receiver. This is common and still allows for car integration.
Programming a Dip Switch Remote to Your Car
-
Ensure Remote Functionality: Make sure your existing dip switch gate remote is working correctly and has fresh batteries.
-
Car Programming Mode: Put your car’s built-in remote system into programming mode as described in your car’s manual.
-
Transmit from Remote and Car Simultaneously: Hold your existing gate remote close to the button you want to program in your car. Press the button on your existing remote and the desired button in your car at the same time and hold them down. The indicator light in your car should blink in a different pattern when programming is successful.
-
Test: Test the programmed car button at the community gate.
Programming a Rolling Code Remote to Your Car (Two-Step Process)
-
Ensure Remote Functionality and Car Programming Mode: Confirm your rolling code gate remote is working and put your car into programming mode.
-
Transmit from Remote and Car (Step One): Similar to the dip switch remote, press the button on your existing rolling code remote and the button in your car simultaneously until the car indicates it has learned the signal.
-
“Learn” at the Gate Receiver (Step Two): Go to the community gate receiver and press the “Learn” button as described in the rolling code programming section above.
-
Finalize Programming from Car: Return to your car and press and hold the programmed button in your car again. This finalizes the rolling code learning process.
-
Test: Test the programmed car button at the community gate.
Troubleshooting Common Issues
- Remote Not Syncing: Double-check that you are following the correct programming steps for your gate type and car. Ensure you are within range of the receiver when needed.
- LED Not Blinking: If the LED light on the receiver or in your car isn’t behaving as expected, re-read the instructions carefully. Battery issues in your remote or car can also cause problems.
- Gate Not Responding: Test your existing gate remote to confirm the gate system itself is working. If your remote works, re-attempt the car programming steps. If neither works, there might be an issue with the gate receiver or remote that requires professional attention.
- Clearing Codes: If you need to start over, refer to your car’s manual for instructions on clearing previously programmed codes from your car’s system.
Maintaining Your Car-Programmed Gate Access
Once programmed, your car’s gate access system should be relatively maintenance-free. However:
- Regular Testing: Periodically test the programmed button to ensure it’s still working correctly.
- Car Battery Health: Ensure your car’s battery is in good condition, as a low car battery could potentially affect the functionality of the built-in remote system.
- Community System Changes: Be aware that community gate systems can sometimes be updated or changed. If you experience issues after a community system update, you may need to re-program your car.
Conclusion
Programming your car to open your community gate is a worthwhile endeavor that significantly enhances convenience and security. By understanding the type of gate system and following the appropriate steps outlined in this guide and your car’s owner manual, you can seamlessly integrate gate access into your vehicle. For further assistance or if you encounter complex issues, consider consulting a professional garage door or gate technician. Visit carcodereader.store for more automotive tips and solutions to keep your vehicle running smoothly and your access points secure.