In today’s fast-paced world, convenience is key. Imagine arriving home and, with just the push of a button inside your car, your gate smoothly opens, welcoming you in. This is the reality of programming your gate opener into your car, a feature that blends security with effortless access. This guide will walk you through the process, ensuring you can easily integrate your gate remote with your vehicle, enhancing both your security and daily convenience.
Understanding Gate Remote Programming Fundamentals
Before diving into the steps, let’s grasp the basics of gate remote programming. At its core, it’s about establishing communication between your handheld remote and your gate’s receiver. Think of it as teaching your gate to recognize a specific signal from your remote. This secure link is what allows you to control your gate from a distance, enhancing both convenience and security.
The system involves two main components: the receiver unit and the remote. The receiver unit, installed near your gate, is the brain that listens for signals. It’s wired to your gate motor and acts as the translator, converting remote signals into the action of opening or closing the gate. The remote, on the other hand, is your handheld transmitter. When you press a button, it sends a coded signal to the receiver, instructing the gate to operate.
Understanding these fundamentals is crucial for successful programming and troubleshooting. Knowing how these components interact will make the programming process less intimidating and more manageable.
Why Integrate Your Gate Opener with Your Car?
Programming your gate remote into your car offers significant advantages, primarily centered around convenience and streamlined access. Imagine no longer fumbling for a separate remote as you approach your gate. Instead, a simple press of a button already integrated into your car’s dashboard or visor grants you entry.
This integration eliminates clutter and simplifies your routine. You reduce the number of devices you need to carry and manage. Forgetting your gate remote becomes a thing of the past as the control is always within your vehicle. Beyond convenience, it enhances security. By integrating the function into your car, you minimize the risk of losing or misplacing a separate remote, potentially preventing unauthorized access to your property. This seamless integration is a modern solution for homeowners seeking both ease of use and enhanced security.
Essential Tools for Gate Remote Programming
Before you begin programming your gate remote, gathering the right tools will streamline the process. Typically, you won’t need an extensive toolkit. The essentials usually include a screwdriver – often a Phillips head – which might be needed to access the receiver unit or battery compartment. If you are working with a garage door opener for context or comparison, a ladder might be necessary to reach higher units, although gate receivers are generally more accessible. Fresh batteries are crucial, especially if your existing remote is older or has been used extensively. Weak batteries can lead to programming failures or inconsistent operation. The most vital tool, however, is your gate remote’s user manual. This document is your specific guide, containing precise instructions tailored to your model, and will be invaluable in navigating the programming steps accurately.
While some gate openers might have unique requirements, like specific programming adapters, these are less common for standard residential gate remotes. Always consult your user manual first. Having these tools ready before you start will save time and frustration, ensuring a smoother and more successful programming experience.
Step-by-Step Guide: Programming Your Gate Remote and Car Integration
Now, let’s delve into the practical steps of programming your gate remote and integrating it with your car. The process generally involves identifying your remote type, understanding the programming method for that type, and then syncing it with your car’s built-in system.
Identifying Your Gate Remote Model
The first crucial step is to accurately identify your gate remote model. Different models, especially different brands, employ varying programming methods. Locating the model number is usually straightforward. Check the back of your remote, under the battery cover, or in the original user manual. Once you have the model number, a quick online search on the manufacturer’s website can often yield specific programming instructions or videos. Knowing your exact model ensures you follow the correct procedure, avoiding frustration and potential errors. If you are unsure, consider emailing a picture of your remote to a specialist for identification and guidance on finding a suitable replacement or programming instructions.
Programming Fixed-Code (Dip Switch) Gate Remotes
For older gate systems, fixed-code remotes with dip switches are common. These remotes use a series of tiny switches, often located inside the remote and on the receiver unit, to set a security code.
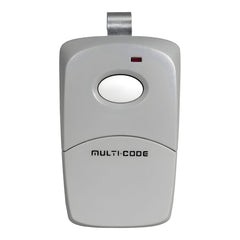
Brands like Multicode and Linear often utilize this technology. Here’s how to program them:
- Locate the Receiver Unit: Find the receiver box, usually near the gate opener. It might have an antenna.
- Access Dip Switches on Receiver: Open the receiver unit to find the dip switches.
- Access Dip Switches on Remote: Open your remote to locate its dip switches, often near the battery.
- Match Dip Switch Positions: Set the dip switches in your remote to match the exact pattern of the dip switches in the receiver unit. The switches are usually toggles that are either “up” or “down.”
- Changing the Code (Optional): To set a new code, change the dip switch positions on both the receiver and the remote to a new, identical pattern.
After setting the dip switches, test the remote. If the gate operates, the programming is successful.
Programming Rolling Code Gate Remotes
Modern gate openers often use rolling code technology for enhanced security. Rolling codes change with each use, preventing code theft. Programming these remotes involves a “learn” button on the receiver.
Here’s the process:
- Locate the Receiver Unit: Again, find the receiver near your gate opener.
- Find the “Program” or “Learn” Button: Look for a button labeled “Program,” “Learn,” or similar on the receiver unit.
- Press the Programming Button: Press and release the “Program” button on the receiver. An LED indicator light usually turns on to show it’s in programming mode.
- Press the Remote Button: Immediately press the button on your handheld remote that you want to use to control the gate.
- Wait and Test: The receiver LED light usually blinks or turns off to indicate successful programming. Test the remote to ensure the gate opens and closes.
Integrating Your Gate Remote with Your Car’s System
To program your gate opener into your car, you’ll typically be using your car’s built-inHomeLink® system or a similar universal receiver. Consult your vehicle’s owner’s manual for the precise instructions, as steps can vary between car manufacturers. However, here are general guidelines for programming both dip switch and rolling code remotes into your car:
Programming a Dip Switch Remote to Your Car:
- Ensure Remote is Working: First, make sure your dip switch gate remote is functioning correctly and can open your gate.
- Car Programming Mode: Refer to your car’s manual to enter the car’sHomeLink® programming mode. This often involves pressing and holding one or two of theHomeLink® buttons until an indicator light blinks. You may need to clear existing codes first by pressing and holding the outer twoHomeLink® buttons for about 20-60 seconds until the indicator light changes.
- Sync Remote and Car: Hold your existing gate remote close to theHomeLink® button in your car that you wish to program. Simultaneously press and hold the button on your gate remote and the chosenHomeLink® button in your car. Keep holding both until theHomeLink® indicator light in your car changes from a slow blink to a rapid blink. This indicates successful programming.
- Test: Test the programmedHomeLink® button to ensure it opens your gate.
Programming a Rolling Code Remote to Your Car (Two-Step Process):
Rolling code remotes require an additional “learning” step to synchronize with your car’s system because of their changing codes.
- Ensure Remote is Working & Car Programming Mode: As with dip switch remotes, ensure your rolling code gate remote is working and put your car’sHomeLink® system into programming mode (as described above, consulting your car manual is key).
- Initial Sync with Car: Perform the same syncing step as with dip switch remotes: Hold your gate remote close to the chosenHomeLink® button and press and hold both buttons until theHomeLink® indicator light blinks rapidly.
- Receiver “Learn” Button Activation: Go to your gate opener receiver unit and press the “Program” or “Learn” button on the receiver (just as you would when programming a new handheld remote directly to the receiver). The LED light on the receiver should turn on.
- Finalize Car Programming: Return to your car and press and hold the programmedHomeLink® button for a couple of seconds, then release. You might need to repeat this press-and-hold process up to three times, as indicated in your car’s manual, until the gate responds. This step finalizes the rolling code synchronization.
- Test: Test the programmedHomeLink® button to ensure it now reliably opens your gate.
Troubleshooting Common Programming Issues
Encountering issues during programming is not uncommon. Here are some troubleshooting tips:
- Remote Not Syncing: Ensure your remote batteries are fresh. Double-check that you are following the correct programming sequence for your remote type (dip switch or rolling code). Make sure you are within range of the receiver during programming.
- LED Light Issues: If the LED on the receiver or car’sHomeLink® system isn’t behaving as expected (not blinking, not turning on), re-read the manuals to confirm normal operation. Try resetting the receiver or car’sHomeLink® system to factory defaults if possible, as per the manuals.
- Gate Not Responding: After programming, if the gate doesn’t respond, re-verify every step. Sometimes, a step might be missed or performed out of sequence. For rolling codes, ensure you completed both the car sync and the receiver “learn” button steps. Check for any obstructions or mechanical issues with the gate itself.
- Factory Reset: If all else fails, consult both your gate opener and car manuals for instructions on performing a factory reset on both the receiver and theHomeLink® system. This can clear out any previous programming errors and allow you to start fresh.
Remember, user manuals are your best resource. They provide model-specific troubleshooting advice and diagrams that can be incredibly helpful.
Maintaining Your Car-Programmed Gate Opener
Once you’ve successfully programmed your gate opener into your car, basic maintenance will ensure consistent, long-term performance.
Regular Check-ups for Your Gate Remote System
Regularly check your gate remote system, both the handheld remotes and the car integration. Periodically test the range and responsiveness of the programmed car button. Ensure the gate opens and closes smoothly and reliably.
Dealing with Battery Issues
Battery issues are the most common cause of remote malfunction. If you notice the range decreasing or the gate becoming less responsive, replace the batteries in your handheld remotes and, if applicable, consider the battery health of your car’sHomeLink® system (though this is less common). Use the correct type of batteries as specified in your remote’s manual.
Conclusion
Programming your gate opener into your car is a worthwhile upgrade for any homeowner seeking enhanced convenience and security. By following this guide, you can simplify your daily routine, ensuring seamless access to your property with just the push of a button within your vehicle. Enjoy the ease and peace of mind that comes with a perfectly integrated gate and car system!
For a wide selection of gate remotes and accessories, visit: https://elitegates.net/collections/remote-controls