Integrating your Genie garage door opener with your car’s built-in remote system offers unparalleled convenience. No more fumbling for a separate remote – with systems like HomeLink and Car2U, your garage door operation is seamlessly integrated into your vehicle. These in-car technologies, typically found as three buttons on your visor or overhead console, draw power directly from your car, eliminating the need for batteries. Genie garage door openers are designed to be fully compatible with both HomeLink and Car2U. HomeLink systems are identifiable by a single LED indicator and often feature a house icon on the center button. Car2U systems, in contrast, have three LED lights, one above each button.
Programming Your HomeLink System for Genie Intellicode
For car owners utilizing the HomeLink system, programming it to your Genie garage door opener is a straightforward process. Follow these steps to get your in-car remote working with your Genie Intellicode system.
Video tutorial available here.
Step 1: Clearing HomeLink Memory
Before programming a new Genie garage door opener, it’s recommended to clear any previously programmed devices from your HomeLink system. This ensures a clean setup and prevents potential conflicts.
- Press and hold the first and third buttons on your HomeLink system simultaneously.
- Continue holding both buttons for approximately 20 seconds. The indicator light on the HomeLink will initially blink slowly and then transition to a rapid blink.
- Once the indicator light is blinking rapidly, release both buttons.
NOTE: Clearing HomeLink will erase all previously programmed garage door openers and other devices.
Step 2: Training HomeLink with Your Genie Remote
This step involves using your existing Genie remote to teach the HomeLink system the correct frequency and code.
- Choose the specific HomeLink button you wish to program for your Genie garage door opener.
- Take your Genie remote and position it close to the HomeLink button, ideally within two inches.
- Press and hold the button on your Genie remote that you typically use to open your garage door.
- Simultaneously, press and hold the chosen HomeLink button.
- Continue holding both buttons until the HomeLink indicator light changes from a slow blink to a rapid blink.
- Once the indicator light blinks rapidly, release both buttons.
Step 3: Programming HomeLink to Your Genie Opener
The final step involves syncing the HomeLink system with your Genie garage door opener unit itself. The procedure varies slightly depending on whether you have a newer or older Genie model.
For Newer Genie Garage Door Openers with a Program Button:
Newer Genie openers are equipped with a “Program” button, usually located on the powerhead unit of the opener in your garage.
- Locate the PROGRAM button on your Genie garage door opener’s powerhead. Press and hold this button until a round blue LED light turns ON. Then, release the button. A long purple LED will start flashing.
- Immediately press and hold the chosen HomeLink button for two seconds, and then release. Repeat this process by pressing and holding the same HomeLink button again for two seconds and releasing. The long LED on the opener will flash blue and then turn off.
- To finalize the programming, press and release the HomeLink button a few more times until your garage door begins to move.
For Older Genie Garage Door Openers with a Learn Button:
Older Genie models typically use a “Learn Code” button instead of a “Program” button.
- Locate the “Learn Code” button on your Genie garage door opener’s powerhead. Press and release this button. A red LED light will begin to blink.
- Within 30 seconds, press and release the desired HomeLink button one time. The red LED on the opener will stop blinking and remain on.
- Press and release the same HomeLink button one more time. The red LED will turn off.
- To test the programming, press the HomeLink button again. Your garage door should now open or close.
NOTE: For more detailed instructions, refer to your vehicle’s owner’s manual, visit www.homelink.com, or www.GenieCompany.com.
Setting Up Your Car2U System with Genie Intellicode
If your car is equipped with a Car2U system, programming it for your Genie garage door opener is also a simple process. Here’s how to program your Car2U system to work with your Genie Intellicode garage door.
Detailed PDF Instructions are available here
Step 1: Resetting Car2U to Default Settings
Car2U systems come with factory default settings, with each button pre-assigned to specific garage door opener brands. Button 1 is typically set for Genie openers. However, resetting to default is a good starting point for programming.
- Button 1 = Genie® Manufactured Openers
- Button 2 = LiftMaster® Manufactured Openers
- Button 3 = Wayne Dalton® Manufactured Openers
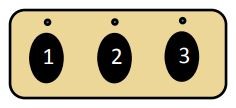 Car2U in car buttons for garage door opener programming
- Press and hold buttons 1 and 3 on your Car2U system simultaneously for 20 seconds. Watch for all three LEDs above the buttons to begin flashing.
- Once all three LEDs start flashing, release both buttons. The Car2U system is now reset to its factory default settings.
NOTE: Resetting the Car2U system will erase any previously programmed garage door openers.
Step 2: Programming Car2U to Your Genie Opener
Similar to HomeLink, programming Car2U involves syncing with your Genie opener, with slight variations for newer and older models.
For Newer Genie Models:
For Genie garage door openers with a Program button.
- Press and hold the PROGRAM button on your Genie garage door opener powerhead until the round blue LED turns ON. Release the button. The long purple LED will then begin to flash.
- Press and hold the Car2U button you want to designate for your Genie opener for two seconds, then release. Repeat this – press and hold the same Car2U button again for two seconds and release. The long LED on the opener will flash blue and then turn off.
- Press the Car2U button a few more times to test and activate your garage door.
For Older Genie Models:
For older Genie garage door openers that utilize a Learn Code button.
- Press and release the “learn code” button on your Genie garage door opener powerhead. The red LED will begin to blink.
- Press the desired Car2U button one time. The red LED on the opener will stop blinking and stay illuminated.
- Press the same Car2U button one more time. The red LED will turn off.
- Press the Car2U button again to operate your garage door.
Step 3: Changing Factory Default Button for a Genie Opener (Car2U)
If you wish to use a Car2U button other than button 1 for your Genie opener, you can change the default setting.
- Press and hold buttons 1 and 3 on your Car2U system for ONE SECOND and release. All three LEDs will light up solid red.
- Press and hold the button (either button 2 or 3) you want to reassign to Genie. The corresponding LED will begin to flash. While still holding this button, press and release button 1. Then, press and release button 1 again.
- Release the button you were holding in step 2 and wait for the LED to stop flashing. This button is now programmed for your Genie opener. Repeat Step 2 if you want to program a second Car2U button for another Genie opener.
NOTE: For further assistance, consult your vehicle’s manual, visit learcar2u.com, or www.GenieCompany.com.