Imagine the ease of pressing just one button in your car to smoothly open your gate as you arrive home. No more fumbling for separate remotes or interrupting your drive. Programming your gate remote to your car offers unparalleled convenience and streamlines your daily routine. This guide will walk you through the process, ensuring you can effortlessly integrate your gate access with your vehicle.
Integrating your gate remote with your car provides a significant upgrade in convenience and security. Instead of managing multiple remotes, you can consolidate control into your car’s built-in system. This not only simplifies operation but also enhances security by reducing the risk of losing or misplacing individual remotes. Let’s delve into understanding the basics before we get started with programming.
Understanding Gate Remote and Car Integration
Before diving into the programming steps, it’s essential to understand the components involved and compatibility factors. Gate remote programming involves establishing communication between your gate’s receiver and a transmitter, which in this case, will be integrated into your car.
There are primarily two types of gate remotes you might encounter:
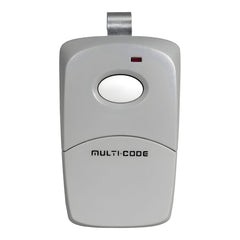
- Dip Switch Remotes: These older remotes use a series of tiny switches inside the device. The code is set by the position of these switches.
- Rolling Code Remotes: These modern remotes offer enhanced security by changing the access code every time the remote is used, preventing code theft.
Similarly, car integration can work in a few ways:
- Built-in Car Systems (Homelink®, Car2U®): Many modern cars come equipped with integrated systems like Homelink or Car2U, designed to learn and operate garage doors, gates, and other home automation devices.
- Universal Garage Door Openers: These are aftermarket devices that can be installed in your car to provide similar functionality.
- Direct Remote Programming: In some cases, you might be programming the car’s system to directly mimic the signal of your existing gate remote.
Understanding which type of remote and car system you have is crucial for successful programming. Now, let’s gather the necessary tools for this task.
Tools and Preparations
To ensure a smooth programming process, gather these tools and information beforehand:
- Your Original Gate Remote: You’ll need your existing, working gate remote to transmit its signal to your car.
- Your Car’s User Manual: This is crucial! Your car’s manual will provide specific instructions on how to program its built-in system (if applicable) for external devices. Look for sections on “Homelink,” “Universal Garage Door Opener,” or similar features.
- A Screwdriver (Potentially): For dip switch remotes, you might need a small screwdriver to access and adjust the dip switches.
- Fresh Batteries for Your Gate Remote (Optional but Recommended): Weak batteries can cause signal issues during programming. Replacing them beforehand can prevent potential problems.
Before you begin, take a moment to read through the relevant sections of both your gate remote’s manual and your car’s user manual. Familiarizing yourself with the specific instructions for your devices will make the process much easier.
Now, let’s move on to the step-by-step guides for programming different types of gate remotes to your car.
Step-by-Step Guide for Programming Different Remote Types to Your Car
The programming process varies slightly depending on whether you have a dip switch remote or a rolling code remote. Here’s how to program each type to your car:
Programming Dip Switch Remotes to Your Car
Dip switch remotes are programmed by matching the switch settings on both the remote and the receiver. To program a dip switch remote to your car:
-
Ensure Your Gate Remote is Working: Verify that your current gate remote is functioning correctly and can open and close your gate.
-
Locate the Dip Switches in Your Car (If Applicable): Some older car systems might have dip switches. Check your car’s manual to see if this is the case and where they are located. More commonly, you will be programming a button in your car to learn the remote’s signal.
-
Access Programming Mode in Your Car: Refer to your car’s user manual for instructions on entering programming mode for your built-in system. This usually involves pressing and holding one or two buttons in your car until an indicator light begins to flash. Often, you need to clear existing codes first by pressing and holding two outer buttons until the indicator light flashes rapidly, indicating memory clear.
-
Transmit the Remote Signal: Hold your working gate remote close to the button you want to program in your car (or as directed by your car’s manual). Press and hold the button on your gate remote that you typically use to open the gate, AND simultaneously press and hold the button in your car that you want to program.
-
Wait for Confirmation: Keep holding both buttons until your car’s indicator light flashes in a different pattern or turns solid. This indicates that your car has learned the signal from your gate remote. This process might take between a few seconds to a minute.
-
Test the Programming: Release both buttons and test the programmed button in your car by pressing it. Your gate should now open or close. If it doesn’t work, repeat the steps, carefully following your car’s manual instructions.
Programming Rolling Code Remotes to Your Car (Two-Step Process)
Rolling code remotes require a two-step programming process due to their enhanced security features. Here’s how to program a rolling code remote to your car:
-
Ensure Your Gate Remote is Working: As with dip switch remotes, first, ensure your existing gate remote is working correctly.
-
Access Programming Mode in Your Car: Enter the programming mode in your car’s built-in system following the instructions in your car’s user manual. This often involves pressing and holding a button until an indicator light flashes slowly. You might need to clear existing codes first as described in the dip switch instructions.
-
Transmit the Remote Signal (Step 1): Hold your working rolling code gate remote close to the button you want to program in your car. Press and hold the button on your gate remote AND simultaneously press and hold the button in your car you are programming.
-
Wait for Initial Learning: Hold both buttons until your car’s indicator light flashes or changes pattern, indicating it has received a signal. Release both buttons.
-
Access the Gate Receiver’s “Learn” or “Program” Button (Step 2): Now you need to activate the “learn” mode on your gate receiver unit. Locate the receiver unit, usually near your gate opener. Look for a button labeled “Learn,” “Program,” or similar. Press this button briefly. An LED light on the receiver should illuminate, indicating it’s in learning mode. You typically have a short window of time (e.g., 30 seconds) to complete the next step.
-
Finalize Programming from Your Car: Immediately return to your car and press and hold the button you programmed in steps 3-5 until your gate activates or the car’s indicator light confirms programming completion (it might flash again or turn solid). This step completes the rolling code synchronization between your car and the gate receiver.
-
Test the Programming: Test the programmed button in your car. Your gate should now open and close reliably. If not, repeat the steps, paying close attention to timing and your manuals’ instructions.
Integrating with Car’s Built-in Systems (Homelink®, Car2U®)
Many modern vehicles feature built-in systems like Homelink or Car2U, designed to simplify integration with garage doors and gates. Programming your gate remote to these systems is generally straightforward:
- Locate Homelink/Car2U Buttons: These are usually found on your rearview mirror, visor, or overhead console.
- Clear Existing Codes (Recommended): To start fresh, it’s often recommended to clear any previously programmed codes. Typically, you press and hold the two outer Homelink buttons until the indicator light flashes rapidly.
- Enter Programming Mode: Press and hold the Homelink button you wish to program and simultaneously press and hold the open button on your existing gate remote.
- Wait for Indicator Light Change: Keep holding both buttons until the Homelink indicator light changes from a slow flash to a rapid flash or a solid light. This indicates successful learning of the frequency signal. For rolling code systems, the Homelink indicator light may flash rapidly immediately and then proceed to the next step.
- Rolling Code Synchronization (If Necessary): If you have a rolling code gate remote (and for many newer garage door openers), you will need to complete a “synchronization” or “learning” step at the gate receiver. Press the “Learn” or “Program” button on your gate opener receiver unit (similar to step 5 in the rolling code remote car programming section). Then, within 30 seconds, return to your car and press and hold the programmed Homelink button for a few seconds, release, and press and hold again (repeat up to 3 times as directed by your car’s manual) until your gate activates.
- Test: Test the programmed Homelink button to ensure it operates your gate correctly.
Refer to your car’s user manual for precise instructions for your specific Homelink or Car2U system, as button locations and indicator light behaviors can vary.
Troubleshooting Common Issues
Encountering issues during programming is not uncommon. Here are some troubleshooting tips:
- Remote Not Syncing:
- Battery Issues: Ensure your gate remote batteries are fresh. Weak batteries can significantly reduce signal strength.
- Distance: Be close enough to your car and, for rolling codes, to the gate receiver during programming.
- Interference: Minimize potential radio interference from other electronic devices.
- Car Not Learning the Remote Signal:
- Clear Memory: Try clearing your car’s memory of previous codes before attempting to program again.
- Correct Button Pressing Sequence: Double-check you are following the exact button pressing sequence and timing as described in your car and remote manuals.
- Compatibility: Verify compatibility between your car’s system and your gate remote type. Some older car systems might not be compatible with all rolling code remotes without specific adapters.
- Range Issues After Programming:
- Antenna: Ensure the antenna on your gate receiver is properly positioned and not damaged.
- Signal Obstruction: Obstructions like metal structures can sometimes reduce range.
- Receiver Sensitivity: In rare cases, the gate receiver’s sensitivity might be an issue, requiring professional inspection.
If you continue to experience problems, re-read both your car’s and gate remote’s manuals carefully. If the issue persists, consider contacting a professional gate installer or a car audio/electronics specialist for assistance.
Maintaining Your Car-Integrated Gate Remote System
Once you’ve successfully programmed your gate remote to your car, maintaining the system is straightforward:
- Regular Battery Checks: Periodically check the batteries in your gate remote and replace them as needed to ensure consistent performance.
- Periodic Testing: Test the programmed button in your car occasionally to confirm it’s still working reliably.
- Re-programming if Necessary: If you change cars or experience issues, you may need to re-program the system following the steps outlined in this guide.
Conclusion
Programming your gate remote to your car is a worthwhile endeavor that significantly enhances convenience and simplifies your daily access routine. By understanding the type of remote and car system you have, carefully following the step-by-step instructions, and taking the time to troubleshoot if needed, you can easily integrate your gate access into your vehicle. Enjoy the simplicity and security of controlling your gate with just a press of a button from your car!