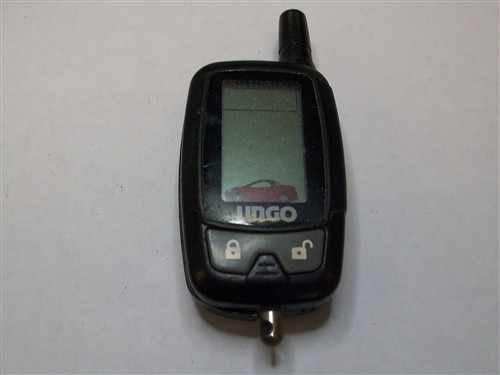
Programming your Ungo car remote can seem daunting, but with the right steps, it’s a straightforward process you can do yourself. This guide provides a comprehensive walkthrough for programming your Clarion/Ungo alarm system remote, commonly made by DEI (Directed Electronics, Inc.). Whether you’re replacing a lost remote or adding an extra one, follow these instructions to get your key fob working seamlessly with your car’s security system.
Before you begin, ensure you have a compatible Ungo remote. You can often find the correct part number on your existing remote or in your vehicle’s owner manual. For your convenience, you can order a compatible key fob here: UNGO RPN 477U EZSDEI477T.
 Ungo RPN 477U EZSDEI477T Key Fob Remote for Clarion Ungo Alarm Systems
This system is designed to recognize up to 4 different remote codes. The programming process, also known as the “learn routine,” allows you to teach new remotes to your system. However, there are a few important preliminary steps and considerations to keep in mind:
Pre-Programming Check:
- Locked Learn Routine: In some cases, the learn routine might be locked, especially if the system was previously programmed using a ProSecurity Programmer. If, upon attempting to program, the siren emits one long chirp, this indicates a locked routine. Unfortunately, unlocking it requires a ProSecurity Programmer, which is typically a tool used by professional installers. If you encounter this, you may need to seek professional assistance.
- Valet/Program Switch: A Valet/Program switch, usually connected to a blue port in your system, is essential for programming. Familiarize yourself with its location – it’s often tucked away under the dashboard.
The Programming Sequence: Door, Key, Choose, Transmit, and Release
Remember this sequence as it’s the backbone of the programming process. Each step is crucial and must be performed in order.
Step-by-Step Programming Instructions:
-
Open the Car Door: Begin by opening any door of your vehicle. This step is critical as it activates the system’s programming mode. Ensure that the green wire (H 1/8) or the violet wire (H1/6) in your system is properly connected for door detection.
-
Turn Ignition to the ON Position: Insert your key into the ignition and turn it to the “ON” position. Do not start the engine; simply turn the key to the position where the dashboard lights illuminate. This step requires the heavy gauge pink wire of your alarm system to be properly connected.
-
Choose Function Step: Within 10 seconds of turning the ignition ON, locate and press the Valet/Program switch. Refer to the function table below to determine how many times to press the switch, corresponding to the function you wish to perform. For programming a remote, we will primarily focus on Function 1: Auto Learn Standard Configuration.
- Press and release the program switch the number of times corresponding to your desired function.
- After selecting the function, press the switch one more time and hold it down.
- You should hear a siren chirp and see the LED flash, confirming the selected function step. Do not release the program switch yet.
Functions Table:
Function Number Function Description Note 1 Auto Learn Standard Configuration (Default) Automatically sets up the remote button configuration. Note: Button configuration is pre-set and cannot be customized. 2 Delete Remotes Erases all remotes from the system’s memory. Useful for security if a remote is lost or stolen. Note: Does not reset system features. 3 Reset Features Resets all system features to factory default settings. Note: Does not delete programmed remotes. 4 Intelli-Tach Reset Resets Intelli-Tach values, initiating re-initialization on the next remote start. Note: ProSecurity Programmer “Zap” feature does not reset Intelli-Tach. -
Transmit Remote Code: While still holding the Valet/Program switch, take your Ungo remote and press the lock button. The system should chirp again to confirm successful programming. This indicates that the remote’s code has been learned by the system, or the selected feature has been reset. Remember, each remote button can only be taught to the system once.
-
Release the Switch: Once you hear the confirmation chirp after pressing the remote button, you can release the Valet/Program switch. The programming process is now complete for that remote.
Programming Additional Remotes or Functions:
If you need to program additional remotes, or if you want to access other functions like deleting remotes or resetting features, you can repeat the process. To move to the next programming step or function, release the Valet/Program switch momentarily, tap it to advance to the next step, and then hold it again to select the new function.
Troubleshooting and Professional Help:
If you encounter difficulties programming your Ungo remote, double-check each step and ensure all connections are secure. If you’re still facing issues or if you suspect the “learn routine” is locked, seeking professional help might be necessary.
To find a professional key fob installer in your area, you can search online using your city or zip code. Professionals have specialized tools and expertise to diagnose and resolve complex programming issues.
By following these detailed steps, you should be able to successfully program your Ungo car remote and enjoy the convenience and security it provides.