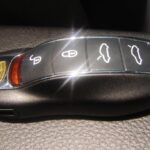
Remote car starters offer unparalleled convenience, especially during harsh weather conditions. Imagine starting your car from the warmth of your home on a frigid winter morning or cooling it down on a scorching summer day. However, issues can arise, such as needing to program a new remote or reprogram an existing one. Whether you’ve added a new remote or are experiencing malfunctions, understanding How To Program Your Remote Car Starter Fob is essential. This guide provides step-by-step instructions, primarily focusing on Ford factory remote start systems, to help you regain control and comfort.
If you are trying to program your remote car starter fob, it’s important to understand that key fobs for remote starters are generally programmed through the remote start unit itself, not directly through the vehicle’s computer for standard keyless entry. The procedure can vary depending on whether you have a factory-installed system or an aftermarket system. For Ford factory remote start systems, the following procedure should be applicable for adding new remotes.
Adding Remote Controls to Your Ford Factory System
Ford factory remote start systems are designed to operate with multiple remote controls, typically up to eight. This is handy if you have multiple drivers or want to keep spare remotes. Here’s how to add a new remote control to your Ford factory system:
-
System Disarmed and Ignition Off: Ensure that your vehicle’s security system is disarmed. The easiest way to ensure this is to unlock the doors using your existing working remote or key and make sure the vehicle ignition is completely turned off.
-
Open Driver’s Door: Open the driver’s side door and leave it open throughout the programming process. This is often a necessary step to activate the programming mode.
-
Turn Vehicle Ignition On: Insert your key into the ignition and turn it to the “ON” position. This is the position right before you would crank the engine to start. Do not start the engine; simply turn the ignition to the ‘ON’ position and leave it there.
-
Locate and Press the Programming/Override Button: The programming or override button is usually located under the instrument panel, often near the steering column or underneath the dashboard on the driver’s side. You may need to look carefully or consult your remote start system’s manual for the exact location if you are unsure. Press and hold this button.
-
Wait for Horn Chirps: Continue to hold the programming/override button. After approximately 15 seconds, you should hear the vehicle horn chirp three times. These three chirps are an indication that the remote control programming mode has been successfully activated.
-
Release the Programming/Override Button: Once you hear the three horn chirps, release the programming/override button. The system is now ready to learn new remote controls.
-
Press Button on New Remote: Take the new remote control fob that you wish to program. Press any button on this new remote. Upon pressing a button, you should hear a single horn chirp or siren sound from your vehicle. This single chirp confirms that the system has successfully “learned” and recognized the new remote control.
-
Repeat for Additional Remotes: If you have more than one remote control to program, repeat step 7 for each additional remote. You can typically program up to eight remotes using this procedure.
-
Turn Ignition Off to Exit Programming Mode: After you have programmed all desired remote controls, turn the vehicle ignition off. Remove the key from the ignition. This action will exit the remote programming mode.
-
Test All Remote Controls: Finally, test all of your remote controls, including the newly programmed ones and any previously working remotes, to ensure they are all functioning correctly with the remote start system.
Deleting and Reprogramming Remotes
In situations where a remote control is lost or stolen, or if you suspect unauthorized access, you might want to delete all previously programmed remotes and reprogram only the remotes you currently possess. Here’s how you can typically do this with a Ford factory system:
-
Reprogramming All Transmitter Code Locations: By following the “Adding Remote Controls” procedure above and programming only the remotes you want to keep, you effectively overwrite the memory locations of the system. If you only reprogram your current, valid remotes, any lost or stolen remotes will no longer be recognized by the system.
-
Using Door Unlock Switch (If Equipped with Factory RKE): Some Ford vehicles equipped with factory Remote Keyless Entry (RKE) offer an alternative method to erase all learned transmitters. While the PowerCode system is in transmitter learn mode (after step 5 in the “Adding Remotes” procedure), pressing the vehicle’s door-mounted “unlock” switch can erase all previously learned transmitters. After erasing, you will then need to reprogram all the remote controls you wish to use, following the steps in the “Adding Remote Controls” procedure.
Troubleshooting Tips
If you encounter issues during the programming process, consider these troubleshooting tips:
-
Remote Battery: Ensure that the battery in your new remote is new and properly installed. A dead or weak battery is a common reason for programming failure.
-
Remote Compatibility: Double-check that the replacement remote is compatible with your specific remote start system. Using an incompatible remote will prevent successful programming. Verify part numbers or consult with a parts specialist if unsure.
-
Procedure Accuracy: Carefully re-read and follow each step of the programming procedure. Missing a step or performing them out of sequence can lead to failure.
By following these steps, you should be able to successfully program your remote car starter fob and enjoy the convenience of remote start functionality. If you continue to experience difficulties, it may be best to consult with a professional automotive technician or the service department at your Ford dealership for further assistance.