Remote car starters offer unparalleled convenience, especially during harsh weather conditions. Arctic Start systems are known for their reliability, but like any technology that uses wireless communication, your remote fob needs to be properly synced with your vehicle’s system. This process is known as remote pairing, and it ensures that your Arctic Start remote transmitter, or key fob, securely communicates with your car’s remote start and security system. Understanding how to program your Arctic Start remote is crucial for seamless operation and security. This guide will walk you through the simple steps to program your remote and address why this procedure is sometimes necessary.
Understanding Remote Pairing for Arctic Start Systems
Remote pairing is essentially the process of teaching your Arctic Start system to recognize the unique signal from your remote fob. Think of it like pairing a Bluetooth device to your phone – it establishes a secure and private connection. Arctic Start systems use sophisticated wireless technology to transmit signals, similar to how your TV remote control works. With the increasing number of wireless devices, securing this connection is vital to prevent interference and ensure that only your remote can control your vehicle’s system. This prevents accidental activation or, more importantly, malicious attempts to tamper with your vehicle’s security. Establishing this private connection is what allows for the secure and reliable operation of your Arctic Start system.
Step-by-Step Guide to Program Your Arctic Start Remote Fob
Programming your Arctic Start remote fob is a straightforward process that you can typically do yourself in just a few minutes. Before you begin, make sure you have your vehicle’s ignition key and all the Arctic Start remotes you wish to program. It’s also a good idea to check the batteries in your remotes to ensure they have sufficient power for programming.
Here are the steps to program your Arctic Start remote:
-
Disarm Your System: If your Arctic Start system’s security features are active, begin by unlocking and disarming the system. This ensures that the system is ready to accept new programming commands.
-
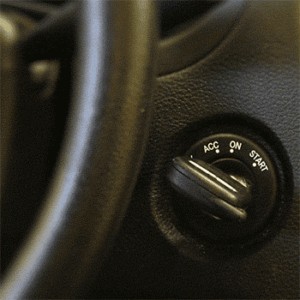
Ignition Key Cycling: Using your vehicle’s ignition key, you need to cycle the vehicle’s power five times within a quick five-second period. This involves turning the key from the OFF position to the ACC (Accessory) or ON position and back to OFF, repeating this five times rapidly. Crucially, do not start the vehicle’s engine during this step. The key should only move between OFF and ACC or OFF and ON. This rapid cycling of the ignition signals to the Arctic Start system that you are initiating the remote programming sequence.
-
Press the Lock Button: Immediately after the fifth ignition cycle, press and hold the lock button (usually indicated by a lock icon or the numeral ‘I’) on your Arctic Start remote for exactly one second. Holding the button for longer than one second might prevent the command from being properly recognized by the system. This press of the lock button transmits the programming signal from your remote to the vehicle.
 Animation of Ignition Sequence for Remote Programming
-
Program Additional Remotes: If you have more than one remote to program, repeat the previous step (step 3) for each additional remote. Make sure to do this in quick succession after initiating the programming sequence with the ignition key cycles.
-
завершение Programming: Once you have programmed all your remotes, remove the ignition key from the vehicle’s ignition. This action completes the programming sequence. Your Arctic Start system should now recognize all the programmed remote fobs.
Important Note about Valet Mode: Be aware that if you initiate the remote pairing sequence by cycling the ignition but do not send any commands from a compatible remote within a short period, the system will automatically enter valet mode as a security precaution. Valet mode temporarily disables the remote start and security features. If your system enters valet mode unintentionally, you can easily deactivate it by referring to the instructions on “How do I deactivate valet mode?” on the Arctic Start website.
When Will You Need to Program Your Arctic Start Remote?
Arctic Start systems are designed with modularity in mind. This means they are composed of interchangeable parts, offering flexibility and easier maintenance. This modular design is a significant benefit as it allows for customization and simpler part replacement. However, due to this modular nature, whenever you introduce a new component, such as a new or replacement remote, it needs to be paired with the existing system.
You will typically need to use the remote pairing feature in the following situations:
- New Remote Fob: If you purchase a new Arctic Start remote fob to replace a lost or damaged one, or to have an additional remote, it will need to be programmed to communicate with your vehicle’s system.
- Replacement Remote Starter System Parts: In some cases, if parts of your Arctic Start remote starter system are replaced, you might need to reprogram your existing remotes to ensure they are recognized by the updated system components.
Even if the replacement remote is the exact same model as the original, it will have a different unique identification code. Therefore, the system will not recognize it until you perform the remote pairing sequence. Programming your Arctic Start remote ensures seamless functionality and maintains the security of your vehicle’s remote start system.