The OBDLink MX+ is a powerful diagnostic tool for your vehicle, and ensuring its firmware is up-to-date is crucial for optimal performance. This article provides a comprehensive guide on how to update the OBDLink MX+ firmware using the OBDLink app and a Windows PC. Regular firmware updates provide bug fixes, performance enhancements, and compatibility with the latest vehicle models.
Updating OBDLink MX+ Firmware with the OBDLink App
The OBDLink app, available for both Android and iOS, offers a seamless firmware update process. Before initiating the update, ensure the following:
- Vehicle Running: Start your vehicle’s engine and ensure it’s running.
- Stable Connection: Connect your smartphone or tablet to the OBDLink MX+ adapter via Bluetooth. Ensure a stable connection and avoid streaming to other Bluetooth devices.
- No Interference: Turn off Bluetooth on any other devices paired with the OBDLink MX+.
Steps to Update Firmware:
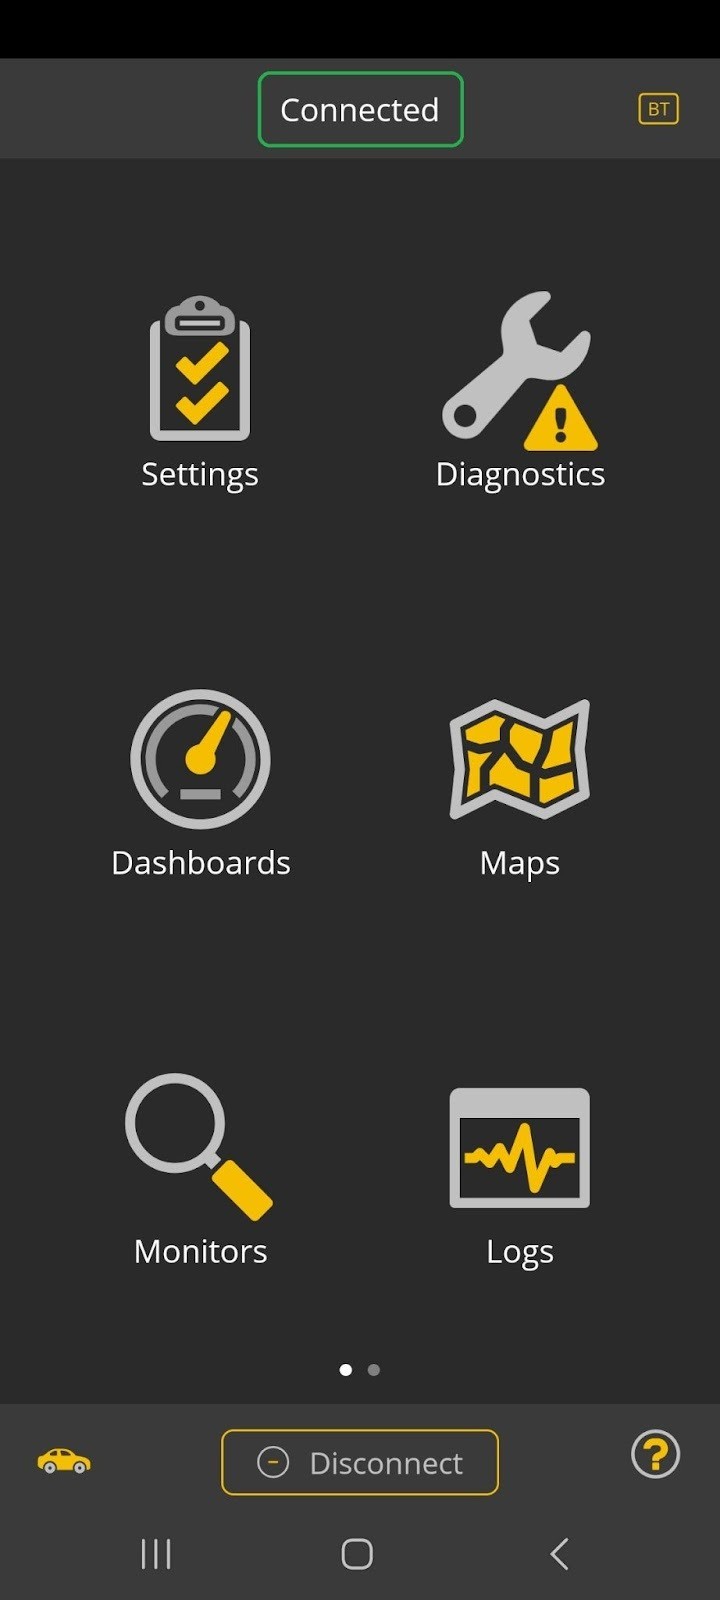
-
Verify Connection: Confirm that the OBDLink app displays a “Connected” status, indicating a successful connection to the OBDLink MX+.
-
Access Firmware Updates: Navigate to “Settings” and then select “Firmware Updates” within the OBDLink app.
-
Check for Updates: Locate the current firmware version. Tap the menu icon (three dots on Android or “Menu” on iOS) and select “Check For Updates”.
-
Download and Install: If a new firmware version is available, you’ll see a notification. Tap the download icon to download the update. Once downloaded, tap “Update Firmware”.
-
Confirmation: Confirm the update by tapping “Update Firmware” again on the confirmation screen. The update process will take approximately 3-5 minutes.
-
Reconnect: After a successful update, the OBDLink MX+ will disconnect. Reconnect to the adapter through the OBDLink app’s home screen by tapping “Connect”.
Updating OBDLink MX+ Firmware with a Windows PC
Alternatively, you can update the firmware using the STN Firmware Updater tool on a Windows PC.
-
Download and Install: Download the STN Firmware Updater utility from the official ScanTool website and install it on your Windows PC.
-
Connect OBDLink MX+: Connect the OBDLink MX+ adapter to your PC.
-
Upload Firmware: Launch the STN Firmware Updater and click “Upload” to initiate the firmware update process.
-
Completion: The updater will indicate when the process is complete. Click “Disconnect” and close the application.
Troubleshooting Connection Issues
If you encounter connection problems after updating, try these steps:
- Power Cycle: Unplug and replug the OBDLink MX+ adapter.
- Bluetooth Settings: Check your device’s Bluetooth settings and ensure the OBDLink MX+ is selected.
By keeping your OBDLink MX+ firmware current, you ensure optimal performance and access to the latest features. Regular updates are essential for maximizing the functionality of your OBDLink MX+ diagnostic tool.