Imagine the convenience of arriving home and, with just a press of a button in your car, your gate smoothly opens, welcoming you in. No more fumbling for a separate gate remote in the dark or rain. Programming your car remote to operate your gate is not just a luxury; it’s a significant upgrade in convenience and security. This comprehensive guide will walk you through the process of programming your car’s remote system to control your gate, ensuring a seamless entry every time.
Understanding Gate Remote Programming and Car Integration
Before we dive into the steps, it’s crucial to understand the basics of gate remote programming and how it interacts with your car. Gate remote programming is essentially teaching your remote to communicate with your gate’s receiver. This receiver, a small device connected to your gate opener, interprets the signal from your remote to open or close the gate.
Integrating your car’s remote system adds another layer of convenience. Modern cars often come equipped with built-in systems like HomeLink® or Car2U®, designed to learn and operate various home automation devices, including garage doors and gates. By programming your gate remote signal into your car’s system, you consolidate control, eliminating the need for multiple remotes.
Why Program Your Car Remote to Your Gate?
Programming your car remote to control your gate offers numerous advantages:
- Enhanced Convenience: Control both your car and gate with a single, integrated system. No more searching for separate remotes.
- Increased Security: Reduce the number of remotes you carry, minimizing the risk of losing or misplacing them.
- Streamlined Entry: Enjoy a smoother, quicker entry process every time you arrive home.
- Modern Integration: Utilize your car’s smart features to enhance your home’s accessibility.
- Value Addition: Integrating your gate with your car’s system can subtly increase your property’s appeal and perceived value.
Essential Tools and Preparations
Before you begin programming, gather the necessary items to ensure a smooth process.
- Your Car’s Manual: Locate your car’s owner’s manual. It will provide specific instructions on how to program the built-in remote system (like HomeLink® or Car2U®).
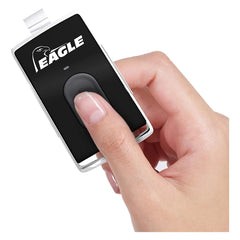
- Your Gate Remote: You will need the existing gate remote that currently operates your gate. Ensure it has fresh batteries and is functioning correctly.
- Step Ladder (Potentially): Depending on the location of your gate receiver unit, you might need a step ladder to access it safely.
- Screwdriver (Potentially): Some receiver units might require a screwdriver to open the housing to access the ‘Learn’ or ‘Program’ button.
- Patience: Programming can sometimes require a few attempts. Patience is key to a successful outcome.
Step-by-Step Guide to Program Your Car Remote to Your Gate
The programming process generally involves two main scenarios, depending on the type of gate remote you have and your car’s system. Let’s explore both:
Scenario 1: Programming a Rolling Code Gate Remote to Your Car
Rolling code remotes are more secure and common in modern gate systems. Here’s how to program them to your car:
-
Clear Existing Car Remote Codes (If Necessary): Some car systems recommend clearing existing codes before programming new ones. Refer to your car’s manual for instructions on how to do this, often involving pressing and holding certain buttons until an indicator light flashes.
-
Initiate Car’s Learning Mode: Consult your car’s manual to activate the car’s built-in remote programming mode. This usually involves pressing and holding one of the car’s HomeLink® or Car2U® buttons until an indicator light begins to blink slowly.
-
Transmit Signal from Gate Remote to Car: Hold your existing gate remote close to the car’s button you are programming (typically within 1-3 inches). Simultaneously press the button on your gate remote and the programmed button in your car. Hold both buttons until the car’s indicator light changes its blinking pattern – usually blinking rapidly or staying solid. This indicates the car has learned the frequency signal from your gate remote.
-
Activate Gate Receiver’s ‘Learn’ Mode: Now, you need to synchronize the car’s learned signal with your gate receiver. Locate the receiver unit of your gate opener. It’s usually a box near the gate motor. Press the ‘Learn’ or ‘Program’ button on the receiver unit. An LED light on the receiver should illuminate or blink, indicating it’s in learning mode. Be ready to move quickly to the next step as the learn mode usually times out after a short period.
-
Finalize Synchronization from Car: Immediately return to your car and press the programmed HomeLink® or Car2U® button again and hold it for a couple of seconds. This sends the learned rolling code signal to the gate receiver. You might need to repeat this step 2-3 times as indicated by your gate opener manual. The gate should activate, or the receiver’s LED light might blink or turn off, indicating successful programming.
-
Test the Programming: Test the programmed car button by pressing it. Your gate should now open and close when you press the programmed button in your car.
Scenario 2: Programming a Dip Switch Gate Remote to Your Car
Dip switch remotes are older style and less common now, but if your gate system uses one, here’s how to integrate it:
-
Ensure Dip Switch Settings Match (Remote and Receiver): Dip switch remotes operate on a set code determined by the positions of tiny switches inside the remote and receiver. For direct car programming, you generally need to ensure the car learns the frequency, not necessarily the dip switch code itself directly. However, understanding your dip switch settings is useful for troubleshooting.
-
Initiate Car’s Learning Mode: Just like with rolling code remotes, start by putting your car’s built-in system into learning mode. Refer to your car’s manual for the exact steps.
-
Transmit Signal from Gate Remote to Car: Hold your dip switch gate remote close to the car’s button you wish to program. Press and hold the button on your gate remote and the car’s programmed button simultaneously. Keep holding until the car’s indicator light signals that it has learned the frequency (usually a change in blinking pattern).
-
Test Car Remote: After the car indicates it has learned the signal, test the programmed button. In some cases with dip switch systems, the car might directly mimic the frequency. Test if pressing the programmed car button now operates your gate. If it does, you’re done!
-
If Direct Programming Fails (Less Common with Dip Switch): If direct programming doesn’t work, and your car system is sophisticated enough, it might still require a ‘learn’ process with the receiver, similar to rolling code systems. In this less common scenario, follow steps 4-6 from the Rolling Code instructions (activating receiver’s ‘Learn’ button and finalizing synchronization from the car). This is less typical for dip switch systems but possible with universal car remote systems.
Troubleshooting Common Issues
Encountering problems? Here are some common issues and solutions:
-
Car Remote Not Learning Signal:
- Battery Issues: Ensure both your gate remote and car have good batteries.
- Distance: Be close enough when transmitting the signal from the gate remote to the car (1-3 inches is usually recommended).
- Clear Existing Codes: Try clearing existing car remote codes first as sometimes memory is full.
- Compatibility: Double-check your car and gate remote compatibility. Some older or very specific systems might not be compatible with universal car remote systems.
-
Gate Not Responding After Programming:
- Synchronization Failure: Ensure you completed the ‘Learn’ process with the gate receiver unit correctly and within the time limit after activating ‘Learn’ mode.
- Range Issues: Test the programmed car button when you are within the typical operating range of your gate.
- Incorrect Button Press: Make sure you are pressing the correct programmed button in your car and on your gate remote during the learning process.
-
Indicator Lights Not Behaving as Expected:
- Consult Manuals: Always refer to both your car’s and gate opener’s manuals for specific indicator light patterns and troubleshooting steps.
- Reset and Retry: Sometimes, resetting the car’s remote system or the gate receiver (if possible and as per manuals) and retrying the programming process can resolve issues.
Maintaining Your Car-Programmed Gate Remote
Once successfully programmed, minimal maintenance is required. However:
- Battery Awareness: Be mindful of your car battery’s health. A weak car battery might affect the range or reliability of your programmed gate remote.
- Regular Testing: Periodically test the car remote to ensure it’s still operating your gate reliably.
- Re-programming if Necessary: If you replace your car battery or if the system seems to lose programming over time (rare, but possible), you might need to repeat the programming process.
Conclusion
Programming your car remote to operate your gate is a worthwhile endeavor that significantly enhances your daily convenience and home security. By following this guide and consulting your manuals, you can seamlessly integrate your gate control into your car’s remote system. Enjoy the ease and sophistication of opening your gate with just the touch of a button from your car!
For a wide selection of gate remotes and accessories, visit: https://elitegates.net/collections/remote-controls